Thursday, November 5, 2009

Hello Blogspot


So once again it's been a long time since I've posted. But I haven't forgotten about you, internet. I've been posting pretty much daily on my tumblr.

<3

Monday, April 27, 2009

Life update! Exciting things!

IMG_0010

Life has gotten quite exciting lately!

My gallery opening was fabulous. Really an amazing end to the semester, and a highlight of my year. Now all I have to do is write my thesis! Ha ha. But seriously, if you are in the area and haven't seen it yet- come see the senior show, everyone's work was great. It's at the Davison Gallery in the CLC.

DSCF7003

S.J. and Anna and I found out that the apartment downtown that we have had our eye on will definitely be ours! Yay! It's right in the middle of the Neighborhood of the Arts, a block from the Memorial Art Gallery and a block from Starry Nites Cafe.

What I'm even more excited about is this: I just got a job, to start the Monday after graduation, as a baker at Dinosaur BBQ! Other than the fact that it's biking/walking distance from our new apartment- I WILL BE A FULL TIME PROFESSIONAL BAKER! They have a baker now, but they just expanded their dessert menu, so they needed to hire a dessert baker. They added some more pies, cheesecakes and desserts... AND CUPCAKES. I. Love. Cupcakes. In case you hadn't noticed. Also, they do a weekly dessert thing, so I will get to make up a dessert every week. Whatever I want. As long as I can make it all week. I'M SO EXCITED. A little nervous, but mostly excited.

IMG_0877

Also, the weather has been beautiful! I'm so excited to take a bike ride!

Daring Bakers April Challenge!

The April 2009 challenge is hosted by Jenny from Jenny Bakes. She has chosen Abbey's Infamous Cheesecake as the challenge.

DSCF6978

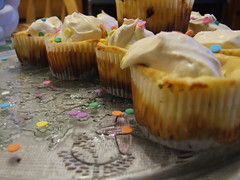
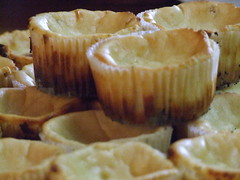
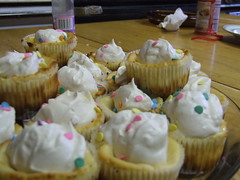
Cheesecake! Not uncommon, but oh so varied! This recipe was good- they say the best. I don't think I'd venture to say it was the best, but it was quite good. I made mini cheesecakes in cupcake tins because... well... I love cupcakes. I flavored the cake and the whipping cream with caramel irish cream and went for the "simple dollop" approach. I adore these confetti sprinkles too, so they were employed. I made them for Easter. We had a small dessert menu this year- just my cheesecakes, a chocolate cake for Joan's birthday, and a coconut custard dessert, the latter two made by my mom.

Here is the recipe and notes given to us in the challenge:

Abbey's Infamous Cheesecake:

crust:
2 cups / 180 g graham cracker crumbs
1 stick / 4 oz butter, melted
2 tbsp. / 24 g sugar
1 tsp. vanilla extract

cheesecake:
3 sticks of cream cheese, 8 oz each (total of 24 oz) room temperature
1 cup / 210 g sugar
3 large eggs
1 cup / 8 oz heavy cream
1 tbsp. lemon juice
1 tbsp. vanilla extract (or the innards of a vanilla bean)
1 tbsp liqueur, optional, but choose what will work well with your cheesecake

DIRECTIONS:
1. Preheat oven to 350 degrees F (Gas Mark 4 = 180C = Moderate heat). Begin to boil a large pot of water for the water bath.

2. Mix together the crust ingredients and press into your preferred pan. You can press the crust just into the bottom, or up the sides of the pan too - baker's choice. Set crust aside.

DSCF6884

3. Combine cream cheese and sugar in the bowl of a stand-mixer (or in a large bowl if using a hand-mixer) and cream together until smooth. Add eggs, one at a time, fully incorporating each before adding the next. Make sure to scrape down the bowl in between each egg. Add heavy cream, vanilla, lemon juice, and alcohol and blend until smooth and creamy.

4. Pour batter into prepared crust and tap the pan on the counter a few times to bring all air bubbles to the surface. Place pan into a larger pan and pour boiling water into the larger pan until halfway up the side of the cheesecake pan. If cheesecake pan is not airtight, cover bottom securely with foil before adding water.

5. Bake 45 to 55 minutes, until it is almost done - this can be hard to judge, but you're looking for the cake to hold together, but still have a lot of jiggle to it in the center. You don't want it to be completely firm at this stage. Close the oven door, turn the heat off, and let rest in the cooling oven for one hour. This lets the cake finish cooking and cool down gently enough so that it won't crack on the top. After one hour, remove cheesecake from oven and lift carefully out of water bath. Let it finish cooling on the counter, and then cover and put in the fridge to chill. Once fully chilled, it is ready to serve.

DSCF6913

Pan note: The creator of this recipe used to use a springform pan, but no matter how well she wrapped the thing in tin foil, water would always seep in and make the crust soggy. Now she uses one of those 1-use foil "casserole" shaped pans from the grocery store. They're 8 or 9 inches wide and really deep, and best of all, water-tight. When it comes time to serve, just cut the foil away.

Prep notes: While the actual making of this cheesecake is a minimal time commitment, it does need to bake for almost an hour, cool in the oven for an hour, and chill overnight before it is served. Please plan accordingly!

DSCF6926

Shutterbug Sunday: Abstract

Started this yesterday, and just didn't get to the "publish post" button! Here's my idea of abstract photography! Thanks Stephanie for this fun idea! Take a look at her pictures over at http://sugarbell.blogspot.com/

IMG_0007

IMG_0002

IMG_0838

Monday, April 20, 2009

Shutterbug Sunday: Rich

So I'm kind of bad at this, but my camera has been on the fritz and I'm awaiting the replacement in the mail. Here are some older pictures though. "Rich" made me think of relationships, food, and color. Also, my life being rich with these things!


IMG_0850

IMG_0736

IMG_0765

IMG_0464

IMG_0007

Sunday, April 5, 2009

Shutterbug Sunday: Pattern

It is 2 in the morning, and so technically Sunday. I have decided to post this now so that it will be up for today, just incase I do something completely uncharacteristic and forget or something.....

Here is my photographic response to: Pattern!

pattern

Wednesday, April 1, 2009

Shutterbug Stephanie

My lovely Stephanie over at Sugar Bell decided to start a themed photo post every week, and I think it's a fabulous idea. It is called "Shutterbug Sundays" and is supposed to be posted on Sundays. I thought of it Sunday, and promptly forgot until today. This week's theme was miniatures. Here is my contribution:

IMG_0231

Tiny daisies in Mom's kitchen. :)

Theme: SJ, and food.

IMG_0765

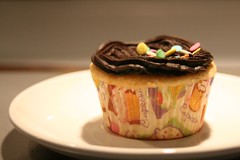
I made these cupcakes last night, per SJ's request. Her favorite: vanilla cake with dark chocolate frosting. Pretty darn delicious, not my absolute favorite though. Also, Mom gave me these sprinkles, which I'm pretty sure are my favorite ever. They're called "spring confetti." Perfect!

SJ and I made biscuits this weekend. They turned out really tasty.

IMG_0736

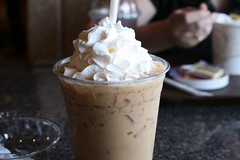
The other day SJ and I also went to Jitters for tasty food and drink.

IMG_0501

IMG_0505

I really love her. I think that she is absolutely top-notch, and feel very blessed to have been living with her for the past year, and look forward to the next year.

IMG_0507

Thursday, March 26, 2009

Wednesday, March 25, 2009

New banner!

Thanks Stephanie! (http://sugarbell.blogspot.com/) Love the new banner! :)

I have a big photo post coming, I've just been busy. And now, I must run away.

Saturday, February 28, 2009

Daring Bakers February Challenge!

So I almost forgot to post!

The February 2009 challenge is hosted by Wendy of WMPE's blog and Dharm of Dad ~ Baker & Chef.
We have chosen a Chocolate Valentino cake by Chef Wan; a Vanilla Ice Cream recipe from Dharm and a Vanilla Ice Cream recipe from Wendy as the challenge.

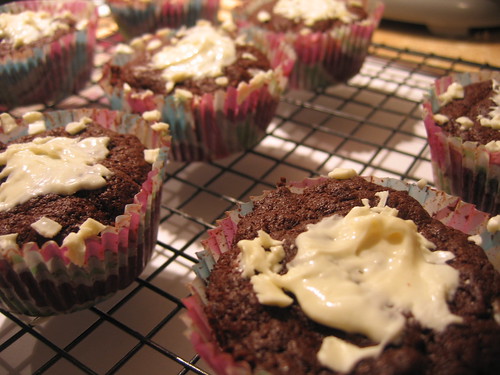
I used 60% dark chocolate, which yielded a very rich, bittersweet cake. In lack of need of a cake, and because I love them, I decided to make cupcakes. I was going to just make little cakes in the cupcake pan like I saw that many people did, but my pans are kind of beaten up and I wasn't sure how great my success would have been to get them out. I topped them with shaved white chocolate and smooshed it around when it melted.

IMG_0004

IMG_0008

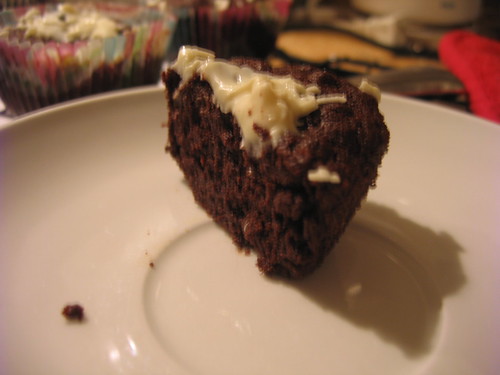
I wouldn't say that I had overwhelming success with the cake. It was good, but I think I either over-beat the eggs, or let the chocolate get too stiff or something, because the texture was just a little off.

IMG_0010

We enjoyed it though.

IMG_0014

Here is the recipe for the cake.


Chocolate Valentino
Preparation Time: 20 minutes
16 ounces (1 pound) (454 grams) of semisweet chocolate, roughly chopped
½ cup (1 stick) plus 2 tablespoons (146 grams total) of unsalted butter
5 large eggs separated

1. Put chocolate and butter in a heatproof bowl and set over a pan of simmering water (the bottom of the bowl should not touch the water) and melt, stirring often.
2. While your chocolate butter mixture is cooling. Butter your pan and line with a parchment circle then butter the parchment.
3. Separate the egg yolks from the egg whites and put into two medium/large bowls.
4. Whip the egg whites in a medium/large grease free bowl until stiff peaks are formed (do not over-whip or the cake will be dry).
5. With the same beater beat the egg yolks together.
6. Add the egg yolks to the cooled chocolate.
7. Fold in 1/3 of the egg whites into the chocolate mixture and follow with remaining 2/3rds. Fold until no white remains without deflating the batter. {link of folding demonstration}
8. Pour batter into prepared pan, the batter should fill the pan 3/4 of the way full, and bake at 375F/190C
9. Bake for 25 minutes until an instant read thermometer reads 140F/60C.
Note – If you do not have an instant read thermometer, the top of the cake will look similar to a brownie and a cake tester will appear wet.
10. Cool cake on a rack for 10 minutes then unmold.

I, sadly, didn't have a chance to make ice cream, but think I still might.

Thursday, February 26, 2009

Dinner!

IMG_0002

Tonight for dinner I sauteed a red bell pepper with some mushrooms seasoned with a pepper spice blend and some salt. Added in a little tomato juice at the end to make it saucy, and stirred in some cheese at the end, just to get it melty. Served over little disk pasta about the same size as the pepper pieces. It was delicious!

Wednesday, February 25, 2009

Healthy AND Delicious!

Photo 197

Sarah and I are having delicious parfaits! Yogurt that was plain that we sweetened just a little, and stirred in a little vanilla. Then we layered it with pineapple, blueberries, mini chocolate chips, and granola. Delicious!

Monday, February 23, 2009

Life update

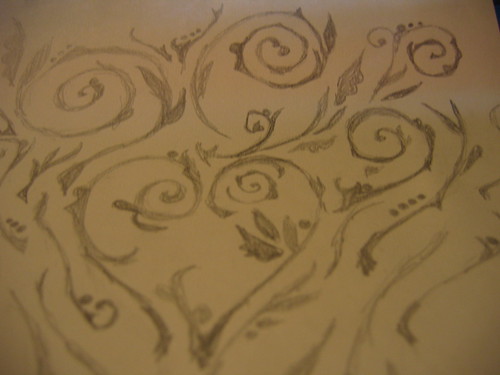
Hello internet. It's been a while. I've been baking a lot, but photographing little, so here's a picture of a doodle from the other day....

IMG_0002

I thought it was perhaps time to post something other than a Daring Bakers challenge (though there's another one of those coming on Saturday.

So what's new in my life, you ask?

Well, I have a job! *applause and cheering* It's part time (20 hours a week), and pretty okay so far. It's at a soup-and-sandwich place in the City called "Cravings on Main Street." They have soups (usually three or four different soups and three kinds of chili) and one of the most extensive sandwich and salad selections I've ever seen. They also have stuff like pizza, fish fry on fridays, nd other such things. As with most things, I think it will get better as I get more settled. I just started my fourth week, so I am starting to get to know things, I'm still not comfortable in my knowledge of the way things work, there is still much to learn, but I know a little more what I'm doing. It definitely has a lot of thumbs up- my hours are 10 to 2, Monday through Friday. The shop closes at two, so I have all afternoon to myself and will never have to work late. The shop is also only open M-F, so I'll never have to work a weekend. About 85-90% of their clientele are regulars, so that's fun, and I'm getting to know some of them by face, and some even by name.

More exciting (and slightly more tenuous) than the job- my senior art show is in a month and a half. OH DEAR I HAVE WORK TO DO. It's mostly exciting, but there is the "it's not guaranteed that you will show" threat over all of our heads. We have an all-faculty critique on Thursday that's going to be a big part of their deciding if we are worthy (if our thesis and work is clear, etc.) to show in April. This one is going to be slightly informal, mostly milling around, eating some munchies and talking about our work when professors come to it. In a few weeks we have the more intense crit where it's them, me, and my artwork for fifteen minutes. "Defend this." Ah. Overall, I have a lot of work to do, but I have a pretty clear idea of where I'm going, I just have to push myself some more.

Oh, also exciting. As of the 15th of March, I have health insurance. Woo. So after that point, feel free to break my bones or infect me with hopsitalizable disease.

Exciting, but not in my life, is that my sister is going to Central America for two months this summer to work with a few different organizations and churches. Prayer (and monetary support) would be great. In preparation she has decided to fast from sweets until she departs. I think that this is awesome, and would be pretty much impossible for me. However, in prayerful support of her, and to implement a little more spiritual discipline in my own life, I have decided to fast from meat until she returns.

n43005655_32286379_9055


There's something else exciting in my life, but it's too early to tell the internet-based-world. Just so that you're kept in a little bit of suspense, and if you feel like it and want to pray for me so that I approach this wisely.

Friday, January 30, 2009

Pictures!

I found my camera! I had put away my suitcase without removing it, it had gotten stuck in the lid pocket.

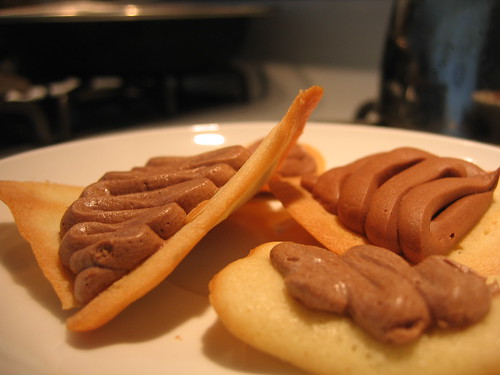
Here is a picture of the Tuilles, the square are filled with chocolate-caramel mousse, and the rounds are filled with chocolate-peppermint. I bent them slightly over a rolling pin.

IMG_0002


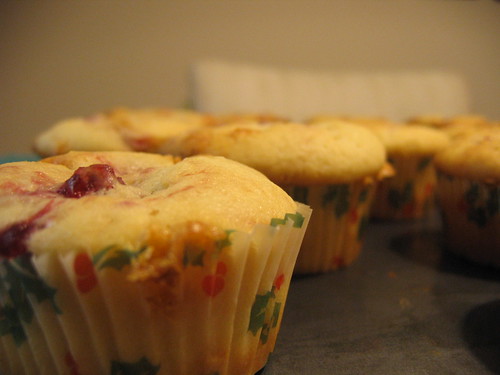
Also, finally: pictures of the Christmas cupcakes. I also made some vegan coconut ones that were delicious, but escaped my camera. If I missed you either due to timing (cupcakes don't exactly keep well, and I traveled a lot in December) or my jerky-oversight, let me know and I will make it up to you!

IMG_0010

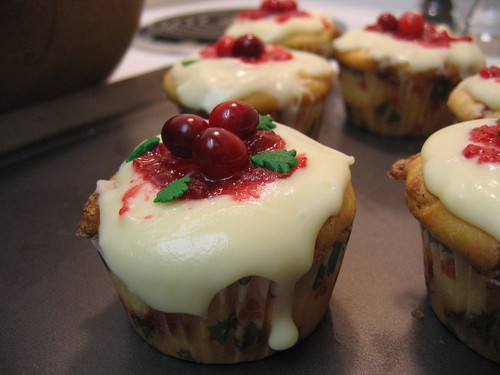
White Chocolate Cranberry- a sweet cream cake dotted with white chocolate chips and filled with stewed cranberries, topped with white chocolate ganache (batches two and three were donned with whipped ganache), a smear of stewed cranberries, some fresh cranberries, and christmas tree sprinkles as leaves.

IMG_0015


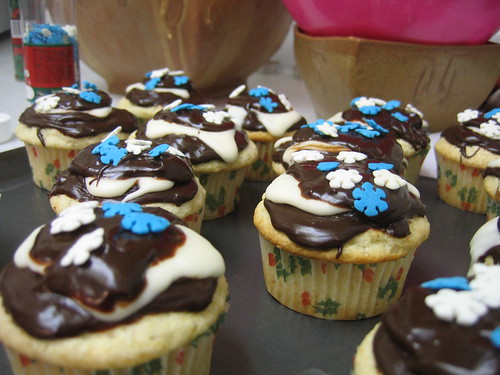
White Mint Dark Chocolate- another sweet cream base generously flavored with peppermint extract, topped with semi-sweet chocolate ganache, a "sloosch" of peppermint goo (as Jillian and I deemed the action), and drizzled with more chocolate, topped with snowflake sprinkles.

IMG_0014

And, because I know that she'll love me for showing this to the world, or at least the internets- Jillian enjoying a mint cupcake, still gooey:

IMG_0006

Thursday, January 29, 2009

Daring Bakers January Challenge!

Sorry I've been so bad about updating.... Maybe it's because I've been busy, maybe it's because there's little to report! Maybe a little of both. :p

Anyway, This month's challenge is brought to us by Karen of Bake My Day (http://www.bakemyday.blogspot.com/) and Zorra of 1x umruehren bitte aka Kochtopf (http://kochtopf.twoday.net/). They have chosen Tuiles from The Chocolate Book by Angélique Schmeink and Nougatine and Chocolate Tuiles from Michel Roux.

Tuiles are really neat, though mine were a little... imperfect... because I left a bunch of my baking supplies at Jillian's before Christmas, and keep forgetting to actually take them with me. There were a few different options, but I made the basic vanilla tuille. Sadly, I can't post a picture at the moment because I seem to have misplaced my camera- I assure you that they are quite cute though! I even had the little photoshoot set up, and then was unable to find my machine.

The extra this month was that we had to pair the delicate cookies with something light- I went with whipped mousse, since I had some left over from other things (chocolate-peppermint and chocolate-caramel), and if I can find someone to be fancy with, I have some vanilla bean coconut milk ice cream that I think would go nicely.

Here are the recipes that were given us, in case you are feeling adventurous. Though a little intimidating because they have to be thin, even, and you have to handle them directly out of the oven, they were quite easy, and relatively quick to make.

~~~*~~~

Following is a recipe taken from a book called “The Chocolate Book”, written by female Dutch Master chef Angélique Schmeinck.

Recipe:
Yields: 20 small butterflies/6 large (butterflies are just an example)
Preparation time batter 10 minutes, waiting time 30 minutes, baking time: 5-10 minutes per batch

65 grams / ¼ cup / 2.3 ounces softened butter (not melted but soft)
60 grams / ½ cup / 2.1 ounces sifted confectioner’s sugar
1 sachet vanilla sugar (7 grams or substitute with a dash of vanilla extract)
2 large egg whites (slightly whisked with a fork)
65 grams / 1/2 cup / 2.3 ounces sifted all purpose flour
1 table spoon cocoa powder/or food coloring of choice
Butter/spray to grease baking sheet

Oven: 180C / 350F

Using a hand whisk or a stand mixer fitted with the paddle (low speed) and cream butter, sugar and vanilla to a paste. Keep stirring while you gradually add the egg whites. Continue to add the flour in small batches and stir to achieve a homogeneous and smooth batter/paste. Be careful to not overmix.
Cover the bowl with plastic wrap and chill in the fridge for at least 30 minutes to firm up. (This batter will keep in the fridge for up to a week, take it out 30 minutes before you plan to use it).

Line a baking sheet with parchment paper or grease with either butter/spray and chill in the fridge for at least 15 minutes. This will help spread the batter more easily if using a stencil/cardboard template such as the butterfly. Press the stencil on the bakingsheet and use an off sided spatula to spread batter. Leave some room in between your shapes. Mix a small part of the batter with the cocoa and a few drops of warm water until evenly colored. Use this colored batter in a paper piping bag and proceed to pipe decorations on the wings and body of the butterfly.

Bake butterflies in a preheated oven (180C/350F) for about 5-10 minutes or until the edges turn golden brown. Immediately release from bakingsheet and proceed to shape/bend the cookies in the desired shape. These cookies have to be shaped when still warm, you might want to bake a small amount at a time or maybe put them in the oven to warm them up again. (Haven’t tried that). Or: place a bakingsheet toward the front of the warm oven, leaving the door half open. The warmth will keep the cookies malleable.

If you don’t want to do stencil shapes, you might want to transfer the batter into a piping bag fitted with a small plain tip. Pipe the desired shapes and bake. Shape immediately after baking using for instance a rolling pin, a broom handle, cups, cones….

Alternative Baking:
Either un-glutenize the batter given substituting the flour for any nut meal or oat flour, or as an alternative use one of the following batters below:

Nougatine:
From Michel Roux: Finest Desserts

5.1/4 cups / 500 grams sliced almonds
(or 4.1/3 cups/500 grams slivered almonds)
3.1/3 cups / 660 grams sugar
4 tbs / 60 grams butter (optional)
2 tbs oil (vegetable, sunflower, peanut)

Makes 2.3/4 lbs/1.2 kgs! (This is the yield of the recipe given in the book, feel free to downsize!)
Preparation time: 25 minutes
Preheat oven: 180C/350F

Spread the almonds on a baking sheet and toast in the oven until lightly browned. Cook the sugar in a heavy based saucepan over low heat, stirring gently and continuously with a spatula, until it melts to a light golden caramel. Add the almonds and stir over low heat for 1 minute, then stir in the butter until completely absorbed. (This is not essential, but will give the nougat an added sheen) Pour the nougatine onto an oiled baking sheet.

Shaping: place a bakingsheet toward the front of the warm oven, leaving the door half open. The warmth will keep the cookies malleable. Work with one piece at a time, of a size appropriate to the shape you want. Roll out each piece on a warm, lightly oiled baking sheet or lightly oiled marbled surface. It is essential to work quickly, since the nougatine rapidly becomes brittle. Heat the nougatine in a microwave oven for a few seconds only to soften it if needed.

Roll the nougatine into the appropriate thickness for your desired shape, but never thicker than 1/8 inch or 3 mm. Quickly cut out your chosen shapes using cookie cutters, or the blade or heel of a chef’s knife. To mold the nougatine, drape it very rapidly over the mold so that it follows the shape and contours. Leave until completely cold before removing from the mold.
Or, cut out and using your fingers or a knife, push into folds or pleats… use as a basket, twirl round a knitting needle..

Nougatine based shapes can be made two or three days in advance, Keep them in a very dry place and do not fill with something like a mousse more than 2 hours prior to serving.

Chocolate Tuiles
Michel Roux’s Finest Desserts
Makes 30
Preparation time: 15 minutes!

9 oz/250 grams dark or white couverture or best-quality bittersweet chocolate, chopped
2/3 cup/75 gr slivered almonds, toasted and cooled

Temper the couverture, and stir in the toasted almonds. Place the template on a sheet of rodoïde (or use a clean sheet of sturdy plastic such as a folder) and fill with about 1 tbs of the mixture. Repeat the process a little distance away from the first one. As soon as you have 5 tuiles fit, slide them onto a mold or rolling pin (side of a glass) to curve. Let cool completely, lift tuiles off the plastic only after the chocolate has set and just before serving, so that they keep their shine.

Or…..Savoury Bakers? You want something else entirely?
Well, let’s see if there’s something to suit your palate too. Parmesan crisps, savory tuiles?
It might be difficult to think fruity with these savoury tuiles but I bet you inventive Daring Bakers can come up with something light to pair. Think salads for instance.... and use this recipe for your tuiles:

Savory tuile/cornet recipe
From Thomas Keller "the French Laundry Cookbook"

1/4 cup plus 3 tablespoons (65 grams/2.1/4 ounces) all purpose flour
1 tablespoon plus 1 teaspoon sugar
1 teaspoon kosher salt (= 2/3 teaspoon table salt)**
8 tablespoons (114 grams/4 ounces) unsalted butter, softened but still cool to the touch
2 large egg whites, cold
2 tablespoons black sesame seeds

In a medium bowl, mix together the flour, sugar and salt. In a separate bowl, whisk the softened butter until it is completely smooth and mayonnaise-like in texture. Using a stiff spatula or spoon, beat the egg whites into the dry ingredients until completely incorporated and smooth. Whisk in the softened butter by thirds, scraping the sides of the bowl as necessary and whisking until the batter is creamy and without any lumps. Transfer the batter to a smaller container, as it will be easier to work with.

Preheat the oven to 400 degrees F.

Make a 4-inch hollow circular stencil. Place Silpat on the counter (it is easier to work on the Silpat before it is put on the sheet pan). Place the stencil in one corner of the sheet and, holding the stencil flat against the Silpat, scoop some of the batter onto the back of an offset spatula and spread it in an even layer over the stencil. Then run the spatula over the entire stencil to remove any excess batter. After baking the first batch of cornets, you will be able to judge the correct thickness. You may need a little more or less batter to adjust the thickness of the cornets.

There should not be any holes in the batter. Lift the stencil and repeat the process to make as many rounds as you have molds or to fill the Silpat, leaving about 1 1/2 inches between the cornets. Sprinkle each cornet with a pinch of black sesame seeds.

Place the Silpat on a heavy baking sheet and bake for 4 to 6 minutes, or until the batter is set and you see it rippling from the heat. The cornets may have browned in some areas, but they will not be evenly browned at this point.

Open the oven door and place the baking sheet on the door.*** This will help keep the cornets warm as you roll them and prevent them from becoming too stiff to roll. Flip a cornet over on the sheet pan, sesame seed side down and place 4-1/2 inch cornet mold at the bottom of the round. If you are right-handed, you will want the pointed end on your left and the open end on your right. The tip of the mold should touch the lower left edge (at about 7 o'clock on a clock face) of the cornet.

Fold the bottom of the cornet and around the mold; it should remain on the sheet pan as you roll. Leave the cornet wrapped around the mold and continue to roll the cornets around molds; as you proceed, arrange the rolled cornets, seams side down, on the sheet pan so they lean against each other, to prevent from rolling.

When all the cornets are rolled, return them to the oven shelf, close the door, and bake for an additional 3 to 4 minutes to set the seams and color the cornets a golden brown. If the color is uneven, stand the cornets on end for a minute or so more, until the color is even. Remove the cornets from the oven and allow to cool just slightly, 30 seconds or so.
Gently remove the cornets from the molds and cool for several minutes on paper towels. Remove the Silpat from the baking sheet, wipe the excess butter from it, and allow it to cool down before spreading the next batch. Store the cornets for up to 2 days (for maximum flavor) in an airtight container.