Monday, December 1, 2008

Thanksgiving and Christmas preparations

IMG_0010

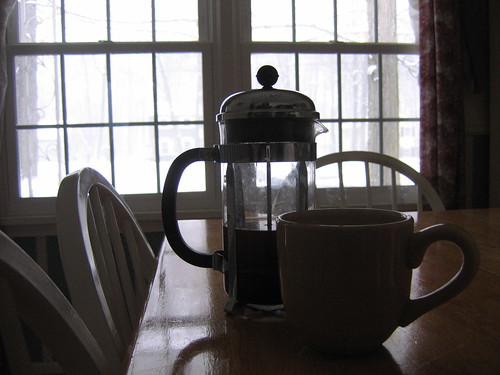
It was quite snowy at home for Thanksgiving. We probably have around a foot of snow. I was a little (but not too) shocked to see only a light dusting when I got back to Rochester. This morning there is only spots of snow in shady areas.

As for Thanksgiving itself, the day and meal were quite lovely. S.J. accompanied me home Wednesday night, and her parents drove out Thursday. She went back with them that evening. It was nice.

IMG_0004

We decorated for Christmas at home, which was nice. We got a new tree, it's smaller, but nicely so. About 2/3 of the lights have really pretty coverings on them (seen above).

Mom sent me back to my house with decorations which I put up last night. I'll take pictures soon.

Also, our new cat, Miss Kitty (formerly known as Porch Kitty) is nice. She's a little jumpy sometimes, we think she might have been abused before someone dumped her and she ended up on our porch. She warms up to people pretty fast, though she seems to like ladies more than men.

IMG_0030

Saturday, November 29, 2008

Daring Bakers November Challenge!

IMG_0004

It's that time again- Daring Bakers Challenge Post time!


Apologies if temporal context is skewed, I'm writing this early and scheduling it to post automatically since on Saturday I'll still be in the land of dial-up.


This month was a caramel cake, with browned butter caramel frosting and optional chewy caramel candies (which I haven't had a chance to make, but likely will because I love caramel and the recipe didn't look too hard).

Our hostess this month was Dolores of Chronicles in Culinary Curiosity and the recipe came from Shuna Fish Lydon of Eggbeater; the cake is her own signature caramel cake. The additional optional challenge was Alice Medrich’s Golden Vanilla Bean Caramels (Golden Vanilla Bean Caramels from Pure Dessert by Alice Medrich, Artisan Press, Copyright 2007, ISBN: 978-1579652111).

Helping the hostess this month was Alex (Brownie of the Blondie and Brownie duo), Jenny of Foray into Food. And for help with hints in alternative baking, Natalie of Gluten-a-Go-Go.


I made three cakes, using a doubled recipe (original recipe below). The things that I did in addition or in opposition to the recipes are as follows: For the browned butter frosting I didn't have a really fine mesh sieve, so I put a coffee filter in my mesh sieve that had no impact on the particles in my browned butter and let it drip through that. It took a while for it all to fall through, but it gave me nice pure flavorful butter. Then I made the frosting to the instructions, but it came out a little thinner than I would have liked it, so I beat in some shortening. I also added some extra caramel and a bit of vanilla because I thought the browned butter flavor was a little too strong. I also filled the two smaller cakes with whipped chocolate buttercream that I had made for the largest cake.

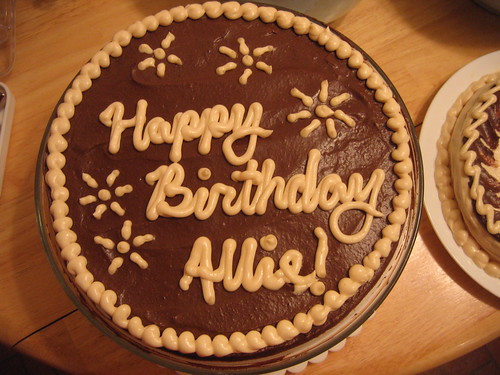
The larger cake was for a birthday party and the hostess requested a yellow cake with chocolate frosting. I liberties with "yellow" and made the caramel cake, and used predominantly chocolate frosting. I did fill it with the butter caramel frosting, and decorated with it. Everyone at the party enjoyed it (at least many people said they did, and no one left any on their plates, so I'm assuming everyone like it).

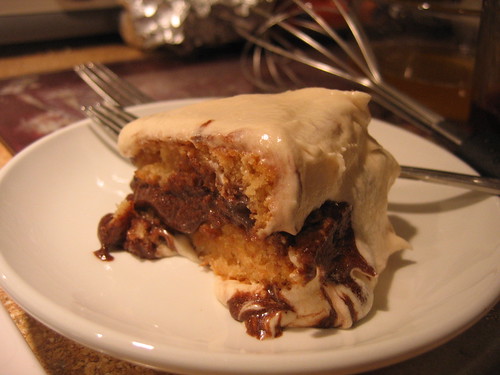
The littlest cake I made for us (my housemate, house-mom and I) to taste immediately, and we were impatient so I cut and frosted it while it was still warm. Though not pretty, it was a delicious decision (cut slice pictured at top). Sarah actually licked her plate clean (combo of really long day and delicious remnants). After being refrigerated it is still delicious, but much more dense in texture, and much much neater. I wouldn't say I prefer it one way or the other, but there is something very satisfying about gooey dessert.

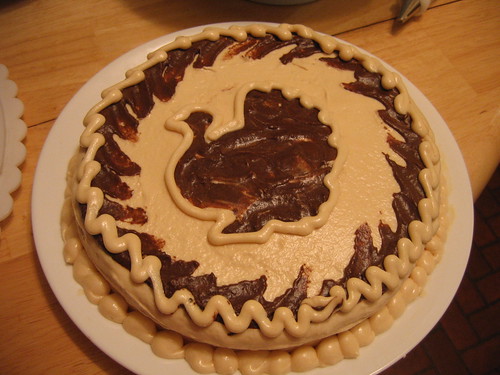
The mid-sized one I made to take home with me when I go home Wednesday. The cake itself was beautiful. As others who made it before me said on the forum, it is a very dense cake, but I didn't mind that. It baked very evenly, and had a beautiful color and taste.

Ugly, partially melting cake for us:

IMG_0005

Thanksgiving cake for family:

IMG_0008

Birthday cake for Allie:

IMG_0011


~*~

And here are the RECIPES, as they were given to us:

CARAMEL CAKE WITH CARAMELIZED BUTTER FROSTING

10 Tablespoons unsalted butter at room temperature
1 1/4 Cups granulated sugar
1/2 teaspoon kosher salt
1/3 Cup Caramel Syrup (see recipe below)
2 each eggs, at room temperature
splash vanilla extract
2 Cups all-purpose flour
1/2 teaspoon baking powder
1 cup milk, at room temperature

Notes from Natalie for those of you baking gluten-free:

So the GF changes to the cake would be:

2 cups of gluten free flour blend (w/xanthan gum) or 2 cups of gf flour blend + 1 1/2 tsp xanthan or guar gum
1/2 - 1 tsp baking powder (this would be the recipe amount to the amount it might need to be raised to & I'm going to check)

I'll let you when I get the cake finished, how it turns out and if the baking powder amount needs to be raised.

Preheat oven to 350F

Butter one tall (2 – 2.5 inch deep) 9-inch cake pan.

In the bowl of a stand mixer fitted with a paddle attachment, cream butter until smooth. Add sugar and salt & cream until light and fluffy.

Slowly pour room temperature caramel syrup into bowl. Scrape down bowl and increase speed. Add eggs/vanilla extract a little at a time, mixing well after each addition. Scrape down bowl again, beat mixture until light and uniform.

Sift flour and baking powder.

Turn mixer to lowest speed, and add one third of the dry ingredients. When incorporated, add half of the milk, a little at a time. Add another third of the dry ingredients, then the other half of the milk and finish with the dry ingredients. {This is called the dry, wet, dry, wet, dry method in cake making. It is often employed when there is a high proportion of liquid in the batter.}

Take off mixer and by hand, use a spatula to do a few last folds, making sure batter is uniform. Turn batter into prepared cake pan.

Place cake pan on cookie sheet or 1/2 sheet pan. Set first timer for 30 minutes, rotate pan and set timer for another 15-20 minutes. Your own oven will set the pace. Bake until sides pull away from the pan and skewer inserted in middle comes out clean. Cool cake completely before icing it.

Cake will keep for three days outside of the refrigerator.

CARAMEL SYRUP

2 cups sugar
1/2 cup water
1 cup water (for "stopping" the caramelization process)
In a small stainless steel saucepan, with tall sides, mix water and sugar until mixture feels like wet sand. Brush down any stray sugar crystals with wet pastry brush. Turn on heat to highest flame. Cook until smoking slightly: dark amber.

When color is achieved, very carefully pour in one cup of water. Caramel will jump and sputter about! It is very dangerous, so have long sleeves on and be prepared to step back.

Whisk over medium heat until it has reduced slightly and feels sticky between two fingers. {Obviously wait for it to cool on a spoon before touching it.}

Note: For safety reasons, have ready a bowl of ice water to plunge your hands into if any caramel should land on your skin.

CARAMELIZED BUTTER FROSTING

12 tablespoons unsalted butter
1 pound confectioner’s sugar, sifted
4-6 tablespoons heavy cream
2 teaspoons vanilla extract
2-4 tablespoons caramel syrup
Kosher or sea salt to taste

Cook butter until brown. Pour through a fine meshed sieve into a heatproof bowl, set aside to cool.

Pour cooled brown butter into mixer bowl.

In a stand mixer fitted with a paddle or whisk attachment, add confectioner's sugar a little at a time. When mixture looks too chunky to take any more, add a bit of cream and or caramel syrup. Repeat until mixture looks smooth and all confectioner's sugar has been incorporated. Add salt to taste.

Note: Caramelized butter frosting will keep in fridge for up to a month.
To smooth out from cold, microwave a bit, then mix with paddle attachment until smooth and light

(recipes above courtesy of Shuna Fish Lydon)

(Optional) GOLDEN VANILLA BEAN CARAMELS
- makes eighty-one 1-inch caramels -

Ingredients
1 cup golden syrup
2 cups sugar
3/8 teaspoon fine sea salt
2 cups heavy cream
1 1/2 teaspoons pure ground vanilla beans, purchased or ground in a coffee or spice grinders, or 1 tablespoon plus 1 teaspoon pure vanilla extract
3 tablespoons unsalted butter, cut into chunks, softened

Equipment
A 9-inch square baking pan
Candy thermometer

Procedure

Line the bottom and sides of the baking pan with aluminum foil and grease the foil. Combine the golden syrup, sugar, and salt in a heavy 3-quart saucepan and cook over medium heat, stirring with a silicone spatula or wooden spoon, until the mixture begins to simmer around the edges. Wash the sugar and syrup from the sides of the pan with a pastry brush dipped in water. Cover and cook for about 3 minutes. (Meanwhile, rinse the spatula or spoon before using it again later.) Uncover the pan and wash down the sides once more. Attach the candy thermometer to the pan, without letting it touch the bottom of the pan, and cook, uncovered (without stirring) until the mixture reaches 305°F. Meanwhile, combine the cream and ground vanilla beans (not the extract) in a small saucepan and heat until tiny bubbles form around the edges of the pan. Turn off the heat and cover the pan to keep the cream hot.

When the sugar mixture reaches 305°F, turn off the heat and stir in the butter chunks. Gradually stir in the hot cream; it will bubble up and steam dramatically, so be careful. Turn the burner back on and adjust it so that the mixture boils energetically but not violently. Stir until any thickened syrup at the bottom of the pan is dissolved and the mixture is smooth. Continue to cook, stirring occasionally, to about 245°F. Then cook, stirring constantly, to 260°f for soft, chewy caramels or 265°F; for firmer chewy caramels.

Remove the pan from the heat and stir in the vanilla extract, if using it. Pour the caramel into the lined pan. Let set for 4 to 5 hours, or overnight until firm.

Lift the pan liner from the pan and invert the sheet of caramel onto a sheet of parchment paper. Peel off the liner. Cut the caramels with an oiled knife. Wrap each caramel individually in wax paper or cellophane.

Monday, November 24, 2008

Friday, November 21, 2008

Thanksgiving is less than a week away!

IMG_0002

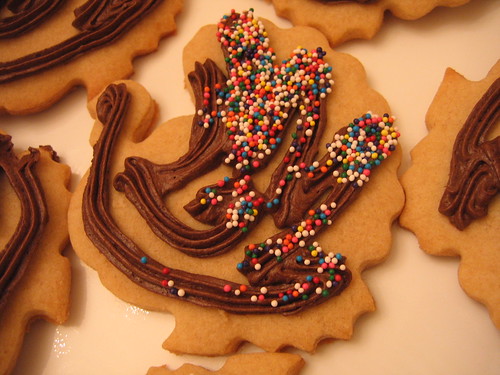
I made turkey cookies. I'm not usually into cutsie holiday motifs, but these are a tradition that must not be broken, for it is far too delicious.

Second day of running today. Went alright, made better time, but felt worse, I think that was due to the terrible night of sleep and the waking up with a sore throat and with sinuses in revolt. Megan is out of town, but Jillian's special friend Chris came with, and he's a police officer, so he helped keep the pace up a little.

Went shopping today too, got a pair of sweatpants for working out in. Jillian got a dress for our fancy party we're having. I got a dress last week. I'm super excited for the party, also my new dress is really pretty. :)

Wednesday, November 19, 2008

Life Change?

Self improvement? Health? These are things I strive for. Today I took one more step in that direction. Jillian and Megan came over so that Jillian could do some laundry. They started working out on Monday (with projected schedule of MWFSa) and invited me along with them today. We walked/jogged/walked/jogged/ran 1.5 miles and decided to work towards a 5K. So yeah… we’re going to run three times a week, do some weights stuff, and swim on Saturdays- and hold each other accountable to it.

Here’s to health.

Also realized I’m in desperate need of workout clothes.

And, Irony of Ironies (yes with capital “I”) Brian was crossing the road when I pulled out of the VAC lot and started driving toward home. We had a hand signal conversation. He’s doing “Okay” (A shrug with up and down hands like a moving weighted balance). The ironic part was that “Without you” by Mad Caddies was playing in my CD player, which is not how I feel anymore, but was how I felt for oh-so-long.

Tuesday, November 18, 2008

28* outside, feels like 16*

IMG_0024

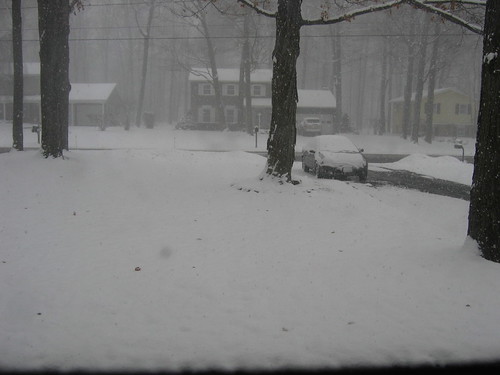
... according to weather.com. It is quite snowy, I haven't been outside yet today though. Took some pictures through the window though.

IMG_0021

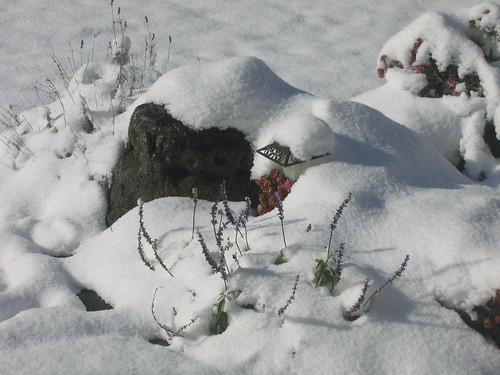
The garden looks a little confused.

IMG_0027

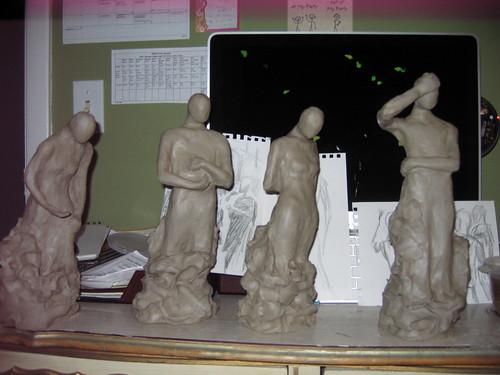
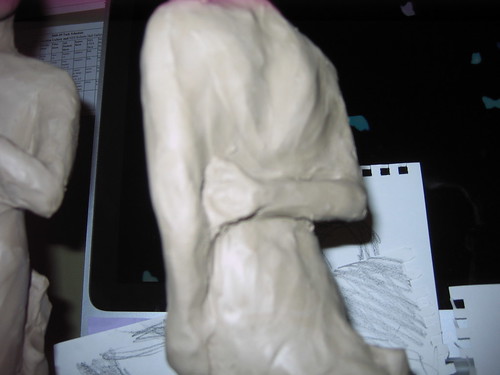
Other than weather developments, work for my senior show is going well. My figures are growing. This last group was not as large as I originally had planned on it being, but I'm pleased with my progress. They are still, obviously, a fraction of my goal, which is life-size. These are still kind of considered "sketches," though they are more developed and larger than some previous sketches. According to the critique feedback from this past Thursday, my work is becoming "more sophisticated." The female figure third from left in the first picture is my, and was everyone at the critique's, favorite and the most successful so far. Please excuse the backdrop. :)

As a reminder, the basic thesis of my work is to explore inner emotion and dialogue between figures in the gesture of a body.

Thoughts and feedback, as always, is appreciated.

IMG_0001

IMG_0006

IMG_0007

IMG_0008

IMG_0009

P.S. I love Iron and Wine.

Wednesday, October 29, 2008

Daring Bakers October Challenge!

Challenge post time! I almost forgot it was posting day, but I didn't. The challenge this time was pizza. The challenge part was that we were supposed to give doing it classically a go- as in *bounce bounce toss spin spin toss.* I was pretty good at the bouncing, but the tossing- not so much. I did love the recipe though, and have made it three times.

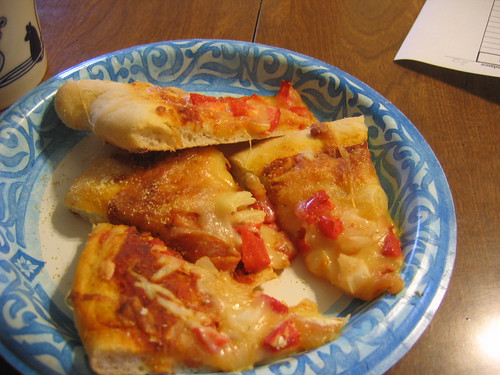
The first time I made it I made the full batch and six pizzas, as is suggested in the recipe. They were for my sister's birthday party, and I didn't get a picture of them fresh because of the hustle and bustle. This is the only picture I got, of the meager remains. They were all topped with red sauce and mozzarella, and then each had different toppings including pepperoni, red pepper, onion, mushroom, tomato, and combinations of those.

IMG_0003

The second time I made it I made a half-batch and made three pizzas which were eaten by my surrogate family and some of my friends. No pictures were taken then, but pesto, tomato, and fresh mozzarella donned all three.

The first two times I made them also I didn't do the refrigerate overnight thing, I just let the dough rest at room temperature for two hours and it worked beautifully.

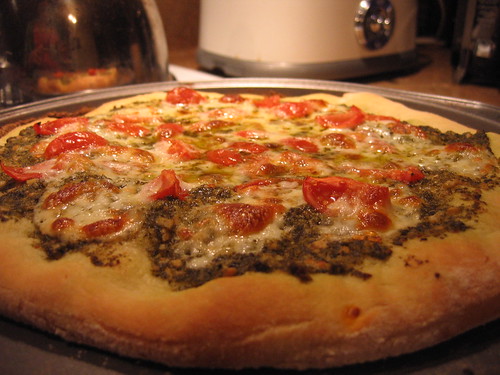
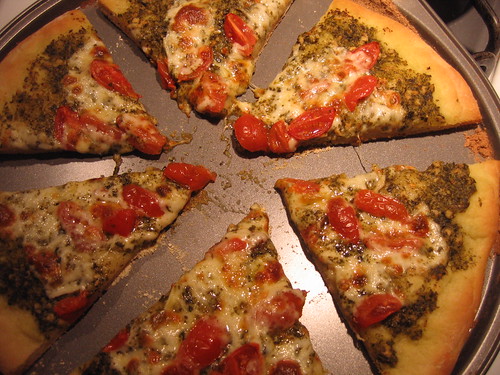
The last time I made it, it was with pesto, grape tomatoes and mozzarella, and I actually got whole pizza photos. The last time I made it I split the dough four ways in stead of six, made two pizzas and six rolls. Also I actually did the refrigerate over night suggestion, which I thought actually made the dough less agreeable.

IMG_0002

IMG_0007

Here is the recipe, the only difference is that I used active dry yeast in stead of instant, which requires using warm water, dissolving the yeast in the water, then adding it plus the oil to the flour/salt. I edited this a little from what was given to us.:

~ BASIC PIZZA DOUGH ~

Original recipe taken from “The Bread Baker’s Apprentice” by Peter Reinhart.

Makes 6 pizza crusts (about 9-12 inches/23-30 cm in diameter).


Ingredients:

4 1/2 Cups flour
1 3/4 Tsp Salt

1 Tsp instant yeast 

1/4 Cup Olive oil or vegetable oil

1 3/4 Cups Cold Water
1 Tb sugar 
Semolina/durum flour or cornmeal


PART ONE


Method:


1. Mix together the flour, instant yeast, and salt in a big bowl (or in the bowl of your stand mixer).


2. Add the oil, sugar and cold water and mix well to form a sticky ball of dough. On a clean surface, knead for about 5-7 minutes.


3. Flour a work surface or counter.  Line a jelly pan with baking paper/parchment. Lightly oil the paper.


4. With the help of a metal or plastic dough scraper, cut the dough into 6 equal pieces (or larger if you want to make larger pizzas).


5. Sprinkle some flour over the dough. Make sure your hands are dry and then flour them.  Gently round each piece into a ball.


6. Transfer the dough balls to the lined jelly pan and mist them generously with spray oil. Slip the pan into plastic bag or enclose in plastic food wrap.


7. Put the pan in the fridge, let the dough rest overnight or for up to three days, OR

PART TWO


8. Rest two hours if refrigerated, one if fresh


9. At least 45 minutes before making the pizza, place a baking stone on the lower third of the oven.  Preheat the oven as hot as possible (500° F/260° C). 

NOTE: If you do not have a baking stone, then use the back of a jelly pan. Do not preheat the pan.


10. Generously sprinkle the back of a jelly pan with semolina/durum flour or cornmeal. Flour your hands (palms, backs and knuckles). Take 1 piece of dough by lifting it with a pastry scraper. Lay the dough across your fists in a very delicate way and carefully stretch it by bouncing it in a circular motion on your hands, and by giving it a little stretch with each bounce. Once the dough has expanded outward, move to a full toss.


11. When the dough has the shape you want (about 9-12 inches/23-30 cm in diameter - for a 6 ounces/180g piece of dough), place it on the back of the jelly pan, making sure there is enough semolina/durum flour or cornmeal to allow it to slide and not stick to the pan.


12. Lightly top it with sweet or savory toppings of your choice.


13. Bake for abour 5-8 minutes.


14. Take the pizza out of the oven; wait 3-5 minutes before slicing or serving. 


Tuesday, October 28, 2008

Oops.

So as most people that know me have noticed, I drop my phone a lot. If this were a sitcom, here is where they would insert a montage of clips showing me dropping my phone set to a witty song. I've been getting better about not dropping it, however, I think that today I made up for the not dropping my phone all the time.

I was making cupcakes while talking to my mom on the phone. I got the cupcakes into the oven without a problem, however, when I went to rotate the pans halfway through baking, I dropped my phone.

INTO THE OVEN.

The door was not open all the way, so my phone slid down the hot door and landed on the bottom of the stove, you know, the metal part right above the FLAMES. My poor mother, she was a little confused. I then proceeded to panic, scramble for tongs, which the Johnsons' don't apparently believe in, grabbed two wooden spoons and fished it out (without burning myself!) It seems to be okay, there are two little melty spots, but they don't seem to be effecting the functioning at all.

Thursday, October 23, 2008

More cupcakes, and a cake. And life.

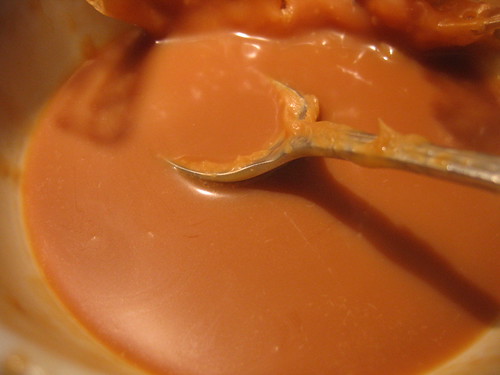
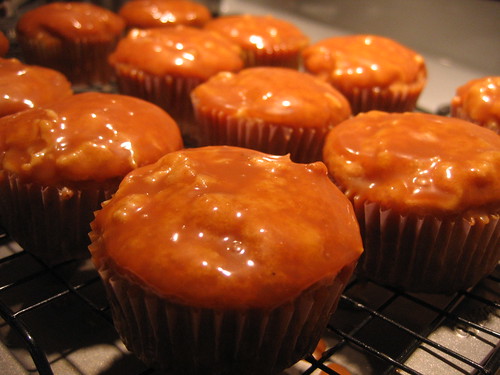
Today I made a birthday cake and Caramel Apple cupcakes- cupcakes with little pieces of apple in them dipped in gooey caramel. Pretty much delicious.

IMG_0004

IMG_0007

IMG_0006

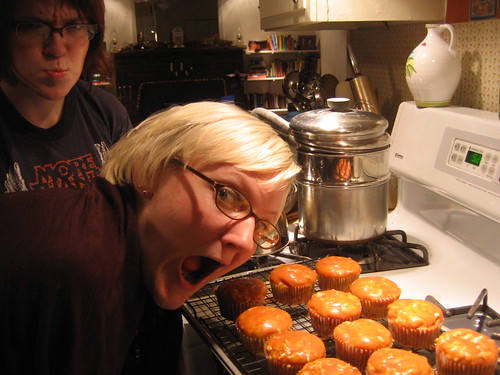
Amanda was visiting, and Sarah was around because she lives here- they were both tired and I fed them a lot of sugar, so it was pretty fun.

IMG_0011

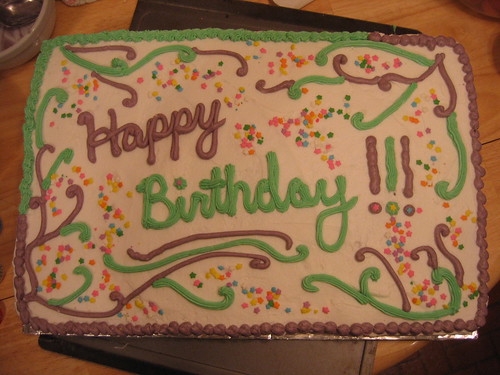
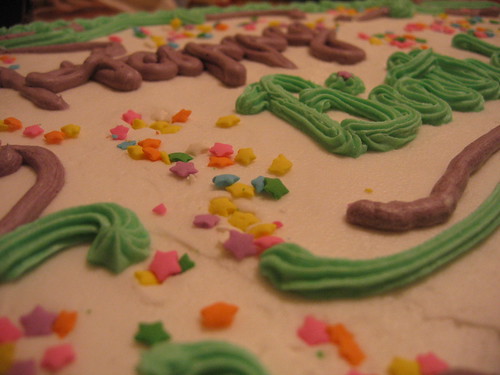
The birthday cake turned out really well, purple and green frosting, with little star sprinkles that Sarah found in the cupboard.

IMG_0012

IMG_0014

Life!

I have my second group critique of senior show work next Thursday. I wish I had more done, but I plan on churning out quite a bit of work this week. I did three sculptures last week, the first was destroyed, and I made two out of that clay. They turned out really well, but my batteries were dead in my camera and now I've taken them to my storage space on campus. I'll post soon about my concept for my show and hopefully put pictures of works in progress.

On the social side of my life, since I'm still looking for a job I have quite a bit of free time. I've been spending quite a bit of time with Jillian, which is really great. I like her a lot. We're in similar places in our lives right now, and we have so much more in common than I thought we did. It's been very nice. I've also had coffee with Brian a few times in the past month. That's been nice too, I'm glad that we can be friends. James and I have also been spending increasing amounts of time together, which is good. That's the nice thing about old friendships, there's enough of a basis there to just pick back up. And of course I've been spending a lot of time with my sister Amanda and her kitty, Zipper.


Life in general is kind of weird right now. I'm going part time, so I'm almost never on campus. I don't have any particular time to be up because my earliest class is at 3 in the afternoon on Tuesday and Thursday, and my other two classes are Wednesday and Thursday nights. I don't work very often, and when I do, it's usually weekend nights at the CLC, or for a few days during the week with the gallery, and that's only about once a month. I have my artwork, which is nice to be able to focus on, and nice to have a lot of time to spend on it, but I don't feel like I'm doing as much as I could be. Bennett said that we should be working harder right now than we ever have been, and I think that's true- I'm just having trouble with my starter it seems. When I do get to work, I work hard and deeply for a long time, it just seems I find myself sleeping more than I mean to most days and getting distracted really easily. I feel like I'm turning into a housecat.

I think that a lot of it is because of my massive lack of structure. I live off campus so I make my own food and can eat whenever I want, I don't have to abide by the dining hall hours. This is good most of the time, but I find myself eating breakfast at 11 and lunch at 4, and dinner is iffy, sometimes happening at 9, or 6 or whenever someone offers me dinner or I am inspired to cook. Sometimes I just pull out some cheese and vegetables and bread and have a picnic standing at the kitchen counter. I'd really like to get a job (especially since I'm quite low on funds at the moment), but part of me wants to take advantage of the ample time I have only spending six to eight hours in class a week to throw myself into my work. Maybe I'm just lazy and don't want to have to take the effort to budget my time. But the other half of me thinks that if I had a part time job at least, I'd have structure and I'd be more productive. But then, it seems like I should be able to just implement structure in my own life, but that is for some reason so much harder than it should be. I've never been good at scheduling personal time.

I basically feel like I bounce along my week in antigravity, floating through the clouds doing little things but not accomplishing much, spending a few hours here and there with friends, but not really being in community with them. It's like everything is falling apart and coming back together all at once, and in slow motion. I'm happier than I've been in a long time, and have more reasons to be happy than I have, but I don't feel there is much that is tangible, and like I'm reaching and not able to grasp my life. I seem to just be kind of confused. I'll stop rambling now.

Tomorrow (tonight, technically) or Saturday we're having a girls' night, probably at Jillian's, so I'm looking forward to that. Also, it's Amanda's birthday as of the strike of midnight 40 minutes ago, Happy Birthday sister!

Monday, September 29, 2008

A cupcake kind of world

IMG_0003

It's been a cup-cakey kind of mood the last few weeks.

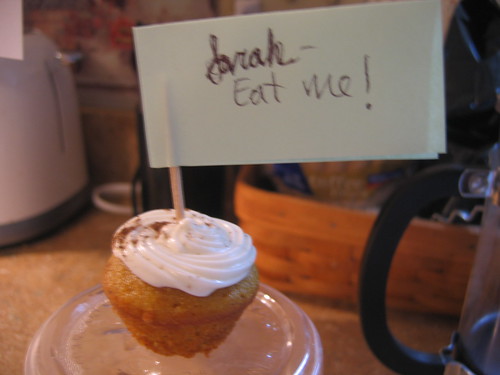
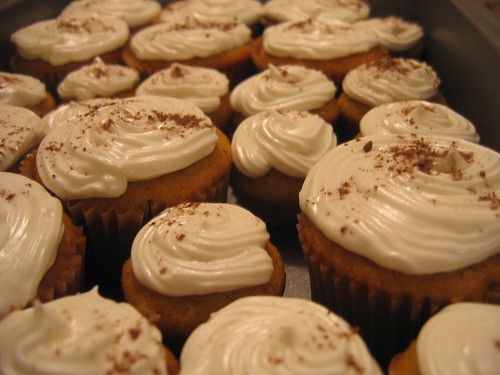
The one above is a mini of the butternut squash variety that I made last week for our art seniors dinner, based on this recipe posted by Garrett on VanillaGarlic.

IMG_0001

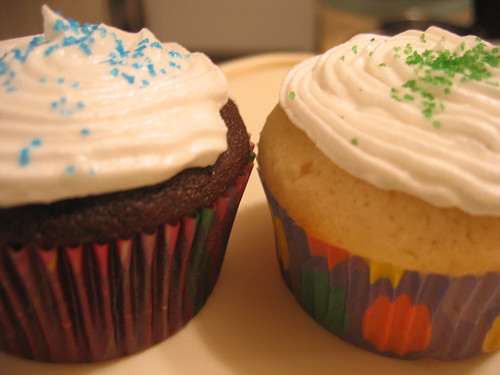
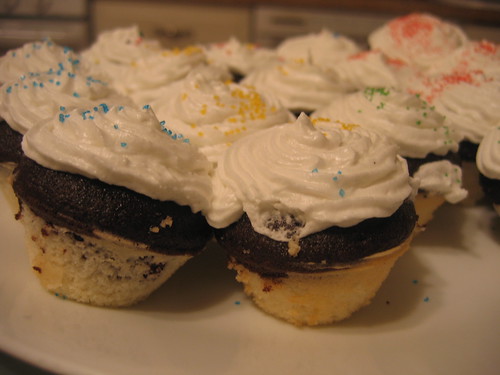
I also made two dozen each vanilla white and dark devil's food cupcakes for my sister's boss's birthday for the Tuesday night meeting (he actually ended up not being able to make it, so I ended up giving them another layer of frosting to cover up the piped well-wishes the I added after these pictures but extra frosting is never bad, so it was okay).

IMG_0001

There was a little extra batter from both of those batches, so I made two-toned minis for the house.

IMG_0002

And the week before last I made cupcakes while making my mother's birthday cake which were initially filled with caramel, but the caramel sank into the cake, so I made a caramel butter cream and filled them, then mixed the extra caramel buttercream with dark cocoa and topped them with that. Those missed the photo shoot though.

Saturday, September 27, 2008

Daring Bakers September Challenge!

This month's challenge was lavash crackers. It was a really open challenge, hosted by some alternative bakers, there were instructions for gluten free and non-gluten free crackers. We could use any flours and toppings, and the second part of the challenge was to create a vegan dip or spread to serve with the crackers.

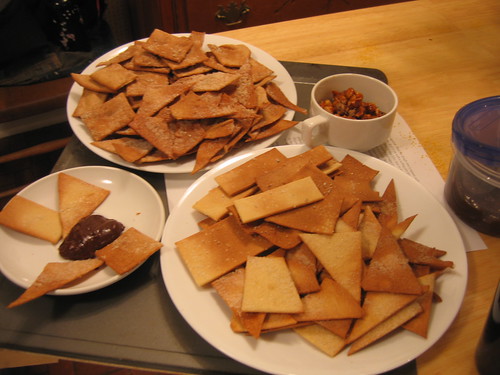
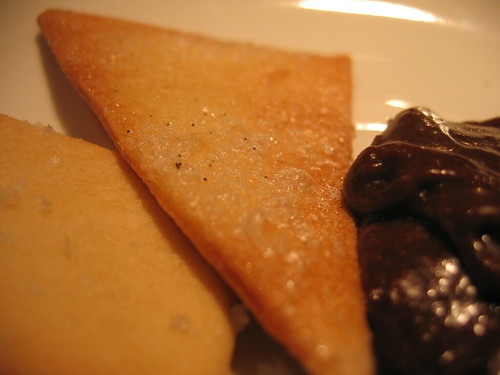
I was in a simple mood when I made this, so I didn't get too crazy with spices or seeds. I made two batches, one with whole-grain spelt, and one with half light spelt/half unbleached white flour. I split both of the batches and did half sprinkled with fleur de sel (the rectangle crackers) and half with vanilla sugar (the triangle-ish crackers). For my dipping sauce/spread I made nutella-type chocolate hazelnut cream. (It was really simple, I had a hint from Sally at aprovechar.danandsally.com that she blended hazelnut praline with melted dark chocolate. She bought her hazelnut praline paste in a jar, but since I had hazelnuts left from the July challenge, I made praline like we did before, I used pure cane sugar to keep with the vegan requirement, processed it to paste again, and drizzled in a square of baking chocolate melted in 1/4 cup agave nectar. In the picture that's all I did. I ended up adding a few tablespoons of coconut milk to it though, because when it got cold it was really thick!)

These were really easy to make, really delicious, and they store well. I made them in the middle of the month and I still have some in zip bags, and they haven't gone stale.

IMG_0008

IMG_0011

IMG_0006

Lavash Crackers, the instructions as given to us:

Makes 1 sheet pan of crackers

* 1 1/2 cups (6.75 oz) unbleached bread flour or gluten free flour blend (If you use a blend without xanthan gum, add 1 tsp xanthan or guar gum to the recipe)
* 1/2 tsp (.13 oz) salt
* 1/2 tsp (.055 oz) instant yeast
* 1 Tb (.75 oz) agave syrup or sugar
* 1 Tb (.5 oz) vegetable oil
* 1/3 to 1/2 cup + 2 Tb (3 to 4 oz) water, at room temperature
* Poppy seeds, sesame seeds, paprika, cumin seeds, caraway seeds, or kosher salt for toppings

1. In a mixing bowl, stir together the flour, salt yeast, agave, oil, and just enough water to bring everything together into a ball. You may not need the full 1/2 cup + 2 Tb of water, but be prepared to use it all if needed.

2. For Non Gluten Free Cracker Dough: Sprinkle some flour on the counter and transfer the dough to the counter. Knead for about 10 minutes, or until the ingredients are evenly distributed. The dough should pass the windowpane test (see http://www.wikihow.com/Determine-if-Bre … ong-Enough for a discription of this) and register 77 degrees to 81 degrees Fahrenheit. The dough should be firmer than French bread dough, but not quite as firm as bagel dough (what I call medium-firm dough), satiny to the touch, not tacky, and supple enough to stretch when pulled. Lightly oil a bowl and transfer the dough to the bowl, rolling it around to coat it with oil. Cover the bowl with plastic wrap.

or

2. For Gluten Free Cracker Dough: The dough should be firmer than French bread dough, but not quite as firm as bagel dough (what I call medium-firm dough), and slightly tacky. Lightly oil a bowl and transfer the dough to the bowl, rolling it around to coat it with oil. Cover the bowl with plastic wrap.

3. Ferment at room temperature for 90 minutes, or until the dough doubles in size. (You can also retard the dough overnight in the refrigerator immediately after kneading or mixing).

4. For Non Gluten Free Cracker Dough: Mist the counter lightly with spray oil and transfer the dough to the counter. Press the dough into a square with your hand and dust the top of the dough lightly with flour. Roll it out with a rolling pin into a paper thin sheet about 15 inches by 12 inches. You may have to stop from time to time so that the gluten can relax. At these times, lift the dough from the counter and wave it a little, and then lay it back down. Cover it with a towel or plastic wrap while it relaxes. When it is the desired thinness, let the dough relax for 5 minutes. Line a sheet pan with baking parchment. Carefully lift the sheet of dough and lay it on the parchment. If it overlaps the edge of the pan, snip off the excess with scissors.

or

4. For Gluten Free Cracker Dough: Lay out two sheets of parchment paper. Divide the cracker dough in half and then sandwich the dough between the two sheets of parchment. Roll out the dough until it is a paper thin sheet about 15 inches by 12 inches. Slowly peel away the top layer of parchment paper. Then set the bottom layer of parchment paper with the cracker dough on it onto a baking sheet.

5. Preheat the oven to 350 degrees Fahrenheit with the oven rack on the middle shelf. Mist the top of the dough with water and sprinkle a covering of seeds or spices on the dough (such as alternating rows of poppy seeds, sesame seeds, paprika, cumin seeds, caraway seeds, kosher or pretzel salt, etc.) Be careful with spices and salt - a little goes a long way. If you want to precut the cracker, use a pizza cutter (rolling blade) and cut diamonds or rectangles in the dough. You do not need to separate the pieces, as they will snap apart after baking. If you want to make shards, bake the sheet of dough without cutting it first.

5. Bake for 15 to 20 minutes, or until the crackers begin to brown evenly across the top (the time will depend on how thinly and evenly you rolled the dough).

6. When the crackers are baked, remove the pan from the oven and let them cool in the pan for about 10 minutes. You can then snap them apart or snap off shards and serve.

Saturday, September 20, 2008

Tumblr

I don't think that I mentioned this before. I got a Tumblr, and I've been posting little updates, pictures, and thoughts there- it really is quick and easy. Enter here.

Tuesday, September 9, 2008

Market day

IMG_0002

So I went to the Rochester Public Market today with my sister, who spent the night last night. Yay twenty-somethings sleepover! Every time that I got to the Market, I think to myself that I need to go there more often. It is so worth it. Other than Lattes at the Market Boulder, I bought:

IMG_0002

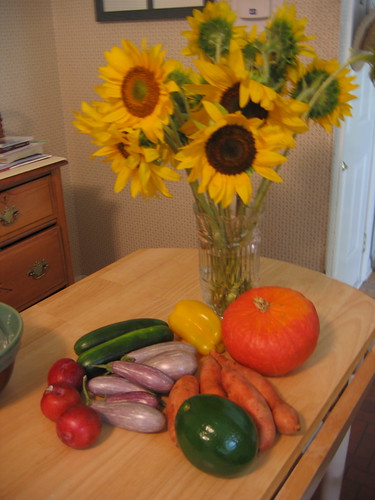
Cucumbers, a beautiful yellow pepper, baby lavender eggplant, a big orange squash that I don't remember the name of, sweet potatoes, an avocado, and pluots, which are a hybrid fruit I think of plums and apricots, also very delicious. There was one that never made it to the picture. I also got an amazing bouquet of sunflowers that I'm going to take home on Friday for mum's birthday. Oh, and some peaches:

IMG_0005

They were two baskets for five dollars. How could I say no?

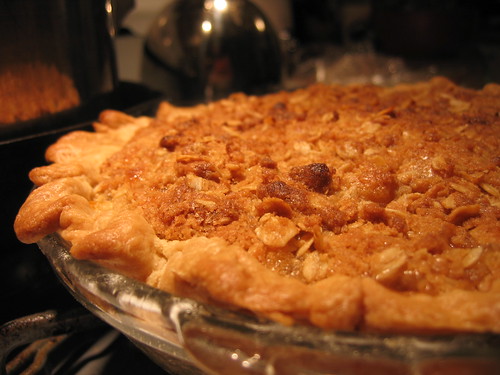
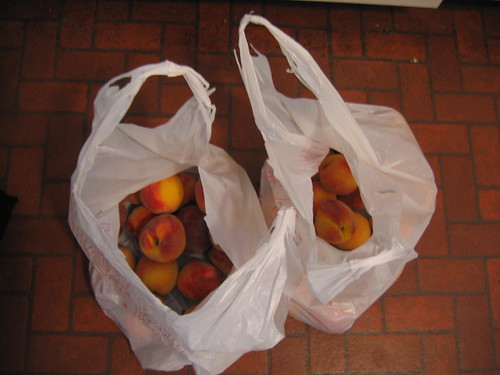
The pie at that top of the entry features some of those babies, three pints went into the freezer, a container is in the fridge for munching, and some were had on ice cream by Mr. Johnson (the dad in the house where I live). I also took about half of the skins that I peeled from the fruit as I cut it up, covered them with water, threw in about a half cup of sugar, and simmered it for a good long while. Then I strained it and simmered it for a while more, and made a very tasty peach syrup for ice cream, waffles, or anything else we can think to put it on.

Also for dinner, I made lasagna with thinly sliced eggplant layered with sauteed ground venison, tomato sauce that I made, ricotta, and a shredded blend of cheese. Getting the ingredients other than the venison (brought frozen from home) and the eggplants, is kind of a funny story.

Not really, but a little. I rode my bike to campus today. Before I left I decided I was going to make the lasagna for dinner. When I was on campus I thought, I'm out, might as well stop at the little IGA in town and pick up some ricotta. While in the store, I realized I also needed tomato sauce. While in the isle I thought of how I don't really like canned sauce and decided to get various cans of tomato paste, plain sauce, and chopped tomatoes which I could make into a nice sauce with fresh herbs from the garden, etc. Then over at the cheese, I grabbed the ricotta, then thought I might need some other cheese because I didn't know what was at the house, so I grabbed a bag of Sargento six cheese Italian blend (which is delicious, by the way). Then I saw the cottage cheese and thought, a nice snack, healthier than some that I've been eating lately, and a definite weakness for me (especially thinking of the fresh peaches at home). So I grabbed a tub of that. I somehow made it to the checkout without dropping things, and realized while I was paying that I had ridden my bike. And had a notebook in my bag already (I need to get a rack for my bike still, so all of my belongings have to go into my messenger bag), and that I would have to put in there my bike chain, which is actually a four or five foot long metal chain with a padlock because I'm too poor to buy something and that's what my dad found to give me. So I got everything into my bag, got on my bike laden with fifteen to twenty pounds of extra weight, and built character on the ride home.

Monday, September 1, 2008

Buckwheat Coconut Soft Chocolate Cookies. Vegan.

So I have finally come to a point where I can make a non-crunchy cookie without eggs. This is so exciting because I quite prefer soft and/or chewy cookies (and the first go at it produced very hard cookies- hard past the point of crunchy). I made these the day that I completely messed up the eclairs. I needed something to restore my baking self-esteem, also because I had touched the "I want sweets" nerve with the idea of allergen-free eclairs.

I highly recommend these. They were awesome, to be humble about it. Also I think that they would translate to GF easily, since there is only one cup of gluteny flour in them.

IMG_0006

Recipe!

Preheat oven to 325* F. Line some cookie sheets with parchment paper.

In a large bowl whisk together:

1 cup Buckwheat flour
1 cup light spelt flour (can sub 1 cup white, wheat, or GF flour+xanthan)
1/2 cup shredded unsweetened coconut
1/2 cup Quinoa flakes (can sup rolled oats, if GF make sure they're certified GF)
1 tsp soda
1 1/2 tsp powder
a heaping 1/2 cup dark cocoa
about 1 1/2 cups light brown sugar

In a separate bowl combine:
1/2 cup + 1 Tbsp coconut oil, melted
2 Tbsp molasses (I used a blurb. Very exact measuring there.)
5 Tbsp warm milk (I used hemp, use whatever kind of milk you want. Coconut milk would go with the theme.)
2 tsp vanilla (again a blurb, probably actually was more than that. It's hard to overdo vanilla, unless you dump the whole bottle in.)
Egg replacer for 2 eggs. I use Ener-G plus a Tbsp of ground flax.

Pour wet ingredients into dry and mix to combine. If needed, add additional milk 1 Tbsp at a time until dough is pliable and shiny.

Scoop onto cookie sheet. If using GF flours, don't forget to smoosh them a little, because they don't generally spread as much.

Bake for 15 minutes or until firm.

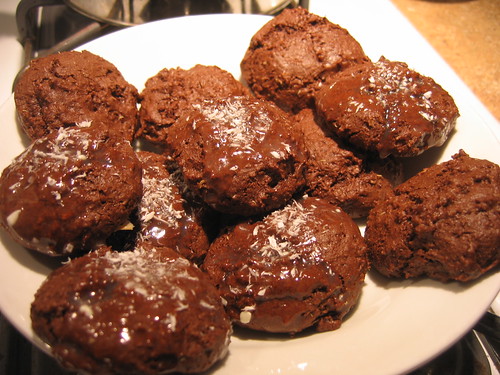
On some of them I added a glaze made from vanilla chips (they weren't vegan) melted with hemp milk and whisked with a little confectionary sugar. I sprinkled those with a little shredded coconut to hide the unmelted bits of chips.

Sunday, August 31, 2008

Daring Bakers August Challenge!

So this one isn't so exciting. The recipe was exciting, but this month was really crazy so I only had time to attempt it once. The recipe was chocolate eclairs, which we could sub another flavor for as long as we kept one chocolate component. I decided to vegan-ize it, or try to (since I try to avoid eggs and milk anyway), and make it chocolate coconut. The coconut would be subtle, mostly from using coconut milk instead of dairy milk. However, a few things went wrong. The Pâte à Choux actually came out really nice, and close to what I interpreted the description to mean. The speckles are from the flax meal that I use in addition to Ener-G as an egg replacement.
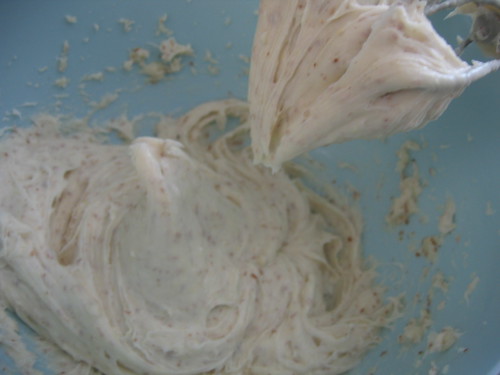
IMG_0001

It piped nicely, and even puffed nicely in the oven. However I got a little ahead of myself and pulled them out too soon, and they fell. You can see that the bottom looks a little thick on this one.
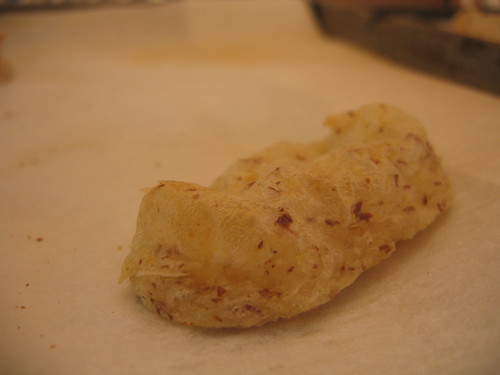
IMG_0004

While they were baking, I made the chocolate pastry cream. Again, it looked nice as I started. I didn't think as much as I should have though, and didn't take into account that egg replacer is starch based, and there is starch in the recipe so the cream thickened nicely, then just kept thickening as I cooled it and I ended up with chocolate-cream gel. It was pretty gross. I didn't even bother taking a picture.

Moving away from the cream back to the pastry, I realized that I messed those up too, I threw it all away and decided to try again. However, a lot has happened this month and I haven't had a chance. I'm going to a friend's house in a little while though, and I think that I'm going to give them another go while I'm there. I wanted to get this attempt up now though so that I made the deadline in case I don't have time to post about the hopefully successful ones we make in a little while. I won't be defeated!


Here is the recipe as it was given to us- the order I found to be kind of confusing, so if I have time later, I will rearrange it and edit it, but I'm a little crunched right now.
Chocolate Éclairs by Pierre Hermé

Éclairs consist of 3 elements:

- Pâte à Choux, also known as Choux Pastry or Cream Puff Dough
- Pastry Cream
- Chocolate glaze

First the modifications:

Under the motto - Culinary Liberty For All, Tony and I thought we should give enough leeway for creativity.


What’s the point in cooking if not to cook what YOU want to eat?


In terms of modifications of this recipe, the possibilities are endless. In order to maintain some sort of cohesiveness throughout the challenge, here are a couple general guidelines for eclair month at the Daring Bakers.


1. The dough used for the eclairs must be a pâte à choux from the recipe given below.
2. Keep one chocolate element in the challenge. The recipe below is for a chocolate glaze and a chocolate pastry cream. You choose which chocolate element you want to keep. Then feel free to mix and match flavors to the base recipe.
3. Everything else is fair game. Enjoy!

Posting Day: August 31st, 2008

Pierre Hermé’s Chocolate Éclairs
Recipe from Chocolate Desserts by Pierre Hermé
(makes 20-24 Éclairs)

• Cream Puff Dough (see below for recipe), fresh and still warm

1) Preheat your oven to 375 degrees F (190 degrees C). Divide the oven into thirds by
positioning the racks in the upper and lower half of the oven. Line two baking sheets with
waxed or parchment paper.

2) Fill a large pastry bag fitted with a 2/3 (2cm) plain tip nozzle with the warm cream puff dough.
Pipe the dough onto the baking sheets in long, 4 to 41/2 inches (about 11 cm) chubby fingers.
Leave about 2 inches (5 cm) space in between each dough strip to allow them room to puff.
The dough should give you enough to pipe 20-24 éclairs.

3) Slide both the baking sheets into the oven and bake for 7 minutes. After the 7 minutes, slip the
handle of a wooden spoon into the door to keep in ajar. When the éclairs have been in the
oven for a total of 12 minutes, rotate the sheets top to bottom and front to back. Continue
baking for a further 8 minutes or until the éclairs are puffed, golden and firm. The total baking
time should be approximately 20 minutes.

Notes:
1) The éclairs can be kept in a cool, dry place for several hours before filling.

Assembling the éclairs:

• Chocolate glaze (see below for recipe)
• Chocolate pastry cream (see below for recipe)

1) Slice the éclairs horizontally, using a serrated knife and a gently sawing motion. Set aside the
bottoms and place the tops on a rack over a piece of parchment paper.

2) The glaze should be barely warm to the touch (between 95 – 104 degrees F or 35 – 40
degrees C, as measured on an instant read thermometer). Spread the glaze over the tops of
the éclairs using a metal icing spatula. Allow the tops to set and in the meantime fill the
bottoms with the pastry cream.

3) Pipe or spoon the pastry cream into the bottoms of the éclairs. Make sure you fill the bottoms
with enough cream to mound above the pastry. Place the glazed tops onto the pastry cream
and wriggle gently to settle them.

Notes:
1) If you have chilled your chocolate glaze, reheat by placing it in a bowl over simmering water,
stirring it gently with a wooden spoon. Do not stir too vigorously as you do not want to create
bubbles.

2) The éclairs should be served as soon as they have been filled.

Pierre Hermé’s Cream Puff Dough
Recipe from Chocolate Desserts by Pierre Hermé
(makes 20-24 Éclairs)

• ½ cup (125g) whole milk
• ½ cup (125g) water
• 1 stick (4 ounces; 115g) unsalted butter, cut into 8 pieces
• ¼ teaspoon sugar
• ¼ teaspoon salt
• 1 cup (140g) all-purpose flour
• 5 large eggs, at room temperature

1) In a heavy bottomed medium saucepan, bring the milk, water, butter, sugar and salt to the
boil.

2) Once the mixture is at a rolling boil, add all of the flour at once, reduce the heat to medium
and start to stir the mixture vigorously with a wooden spoon. The dough comes together very
quickly. Do not worry if a slight crust forms at the bottom of the pan, it’s supposed to. You
need to carry on stirring for a further 2-3 minutes to dry the dough. After this time the dough
will be very soft and smooth.

3) Transfer the dough into a bowl of a mixer fitted with the paddle attachment, or using your
handmixer or if you still have the energy, continue by hand. Add the eggs one at a time,
beating after each egg has been added to incorporate it into the dough.
You will notice that after you have added the first egg, the dough will separate, once again do
not worry. As you keep working the dough, it will come back all together again by the time you
have added the third egg. In the end the dough should be thick and shiny and when lifted it
should fall back into the bowl in a ribbon.

4) The dough should be still warm. It is now ready to be used for the éclairs as directed above.

Notes:
1) Once the dough is made you need to shape it immediately.

2) You can pipe the dough and the freeze it. Simply pipe the dough onto parchment-lined baking
sheets and slide the sheets into the freezer. Once the dough is completely frozen, transfer the
piped shapes into freezer bags. They can be kept in the freezer for up to a month.

Chocolate Pastry Cream
Recipe from Chocolate Desserts by PierreHermé

• 2 cups (500g) whole milk
• 4 large egg yolks
• 6 tbsp (75g) sugar
• 3 tablespoons cornstarch, sifted
• 7 oz (200g) bittersweet chocolate, preferably Velrhona Guanaja, melted
• 2½ tbsp (1¼ oz: 40g) unsalted butter, at room temperature

1) In a small saucepan, bring the milk to a boil. In the meantime, combine the yolks, sugar and cornstarch together and whisk in a heavy‐bottomed saucepan.

2) Once the milk has reached a boil, temper the yolks by whisking a couple spoonfuls of the hot milk into the yolk mixture.Continue whisking and slowly pour the rest of the milk into the tempered yolk mixture.

3) Strain the mixture back into the saucepan to remove any egg that may have scrambled. Place the pan over medium heat and whisk vigorously (without stop) until the mixture returns to a boil. Keep whisking vigorously for 1 to 2 more minutes (still over medium heat).Stir in the melted chocolate and then remove the pan from the heat.

4) Scrape the pastry cream into a small bowl and set it in an ice‐water bath to stop the cooking process. Make sure to continue stirring the mixture at this point so that it remains smooth.

5) Once the cream has reached a temperature of 140 F remove from the ice‐water bath and stir in the butter in three or four installments. Return the cream to the ice‐water bath to continue cooling, stirring occasionally, until it has completely cooled. The cream is now ready to use or store in the fridge.

[bNotes:[/b]
1) The pastry cream can be made 2‐3 days in advance and stored in the refrigerator.

2) In order to avoid a skin forming on the pastry cream, cover with plastic wrap pressed onto the cream.

3) Tempering the eggs raises the temperature of the eggs slowly so that they do not scramble.

Chocolate Glaze
Recipe from Chocolate Desserts by Pierre Hermé
(makes 1 cup or 300g)

• 1/3 cup (80g) heavy cream
• 3½ oz (100g) bittersweet chocolate, finely chopped
• 4 tsp (20 g) unsalted butter, cut into 4 pieces, at room temperature
• 7 tbsp (110 g) Chocolate Sauce (recipe below), warm or at room temperature

1)In a small saucepan, bring the heavy cream to a boil. Remove from the heat and slowly begin to add the chocolate, stirring with a wooden spoon or spatula.

2) Stirring gently, stir in the butter, piece by piece followed by the chocolate sauce.

Notes:
1) If the chocolate glaze is too cool (i.e. not liquid enough) you may heat it briefly
 in the microwave or over a double boiler. A double boiler is basically a bowl sitting over (not touching) simmering water.

2) It is best to glaze the eclairs after the glaze is made, but if you are pressed for time, you can make the glaze a couple days ahead of time, store it in the fridge and bring it up to the proper temperature (95 to 104 F) when ready to glaze.

Chocolate Sauce
Recipe from Chocolate Desserts by Pierre Hermé
(makes 1½ cups or 525 g)


• 4½ oz (130 g) bittersweet chocolate, finely chopped
• 1 cup (250 g) water
• ½ cup (125 g) crème fraîche, or heavy cream
• 1/3 cup (70 g) sugar

1) Place all the ingredients into a heavy‐bottomed saucepan and bring to a boil, making sure to stir constantly. Then reduce the heat to low and continue stirring with a wooden spoon until the sauce thickens.

2) It may take 10‐15 minutes for the sauce to thicken, but you will know when it is done when it coats the back of your spoon.

Notes:
1) You can make this sauce ahead of time and store it in the refrigerator for two weeks. Reheat the sauce in a microwave oven or a double boiler before using.
2) This sauce is also great for cakes, ice-cream and tarts.
Thursday, August 14, 2008

What a week.

So this has been quite the week. Sunday night I went to the new night worship service led by friends at their church in LeRoy. I don't know the name of the church, just that they call it the golf ball, because that's what the building looks like. It's a large faceted white dome that looks like a golf ball half sunken into the ground. After the service we went to the Barringer's house; always a good thing, I love them and could use the positive company. I ended up having a long tearful conversation about certain recent events with Chrissy. It was a good conversation, and my time with the rest of the family was lovely also.

A large precursor to this week, and something that has been on my mind quite a lot, that I haven't shared with you, internet, is that Brian and I broke up three and a half weeks ago. I'm sure you understand why I wouldn't post this right away, as it is something that has been difficult to deal with. I am, obviously, still dealing with it, but it has become common knowledge and I've stopped crying every time I think about it, so it's time you know dear internet. It was a peaceful breakup, no hard feelings or fights or anything, but still very hard.

Monday morning at eight o'clock I received a call from Brian to tell me that his grandfather had passed away earlier that morning. It is a terrible loss, he was a wonderful man and will be missed. I held him in very high esteem, and it has been hard to see him lose the short and intense fight he had with the cancer in his throat. Prayers for Brian and his family are greatly appreciated, and this loss has left a huge hole. Rest in Peace, John "Dee" Deschamps.


***


I went home Monday, much later than I meant to due to several things. The purpose of my going home was that my car has been acting weird and I had a dentist appointment. The dentist appointment went fine. My car, however, needed some major engine tuning up. Everything was fine though, and fixable, which is good. However, there is a sequel to that story.

First, a picture of George. This is his "WTF is that thing, and why is it clicking at me?!" face.

IMG_0006

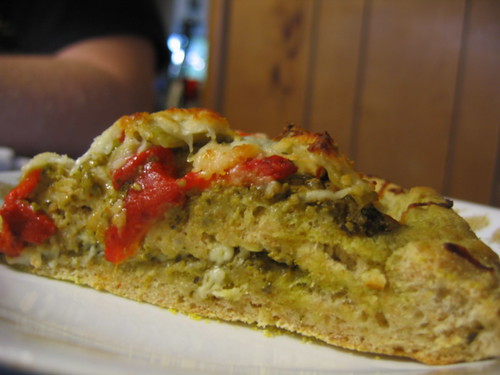
Tuesday night I made dinner. A few weeks ago I was hanging out with my friend James and we went to a place in Brockport called Zonie's for dinner, which is a place that serves calzones. Only calzones, with almost any filling you could think of. Since we went there, I've been craving calzone. I however, also wanted pizza. So I created a pizza-calzone. Basically I made two rounds of dough, topped the first with pesto and cheese, moistened the edges, and put the second round on top. After crimping the edges together (as you would with a pie), I topped it with more pesto, artichoke hearts, chopped roasted red pepper, mushrooms, and cheese. It was pretty much awesome. Also, the dough recipe was pretty much the best I've ever made. It was super simple too (however glutenous, though I'd like to try it with alternate flours):

Mix together until dissolved:
1 cup warm water
1 packet/1 Tbsp yeast

Stir in:
1 tsp sugar
1 tsp salt
2 Tbsp oil
2 1/2 cups flour (I used 1 1/2 cups unbleached white and 1 cup whole wheat)

I also added a heaping spoonful of pesto to the dough.

Assemble pizza as desired, bake at 425*F for 20-30 minutes, depending on thickness, until firm and golden at edges.

IMG_0012

Then yesterday I went and hung out with Steve and we made a similar creation, only with all white flour, no red pepper (because I forgot to buy one), and ricotta added into the center and top. Also delicious.

My day yesterday was quite eventful. I was planning to leave by eleven to be to Rochester by one. I actually left on time. However, not two miles from my house my car began to do that sputtering thing that was the whole reason for the tune up in the first place. "Oh dear," said I. I pulled off the road and called my mom who suggested taking it back to Dave. I did, and he said it sounded like there was still some water in my tank, so he gave me some super extra dry gas and said that it should be fine after I filled up with gas. He and I took it for a drive, and it was fine, so after dropping him back off at the garage, I went on my way. It stuttered a few times, but seemed fine. And it was, mostly, until I went through the toll booths to go into Buffalo. If you have never been to Buffalo, the thruway is a four lane highway where no one cares about anything except how much they can break the speed limit.

After my ezpass registered, I eased on the gas to accelerate- and nothing happened. "Oh no." Thought I.

Then my engine caught and the RPMs rocketed, but there was no shifting and I was still going a nice slow 20 mph or so. I got over to the middle lane and nestled myself behind an also slow-going semi and tried to control my panic. My car very slowly inched up, but around 40 started sputtering and hiccuping, and I tried to remain calm. For a short period of time things seemed to go back to normal, but soon it was sputtering again. I decided it was probably a good idea to exit the highway and the next exit was the exit for the Walden Galleria Mall. This exit is a two lane curved ramp with a stop light at the end. The light was red. I thought to myself, if I stop will I start again? And, sure enough, not twenty seconds after I came to a stop my car gave out a violent shutter and completely died.

This did not ease my sense of panic.

I got it to start again and began to beg the light to turn green. It did (though took its time) and I shutteringly got off the ramp and into a parking lot. I then called my mom and triple A and was subsequently towed back home to Dave's. The problem was quite a simple one, though effective. When he revamped my engine, he replaced a bunch of parts. The place where he gets his parts from carried two grades of parts- the good kind that he gets, and the off brand. The one part that he needed was out of stock in his preferred brand, so knowing that I needed to get back to Rochester, he got the off brand. He has solidified why he doesn't use those products. This part that he had to get was the spark plug mechanism. The way that it is is there is a little box with wires that have to go down into the engine and are secured in place by little rubber plugs that fit into the holes and are held there and then secured when the engine is turned on by suction. Apparently the suction didn't work correctly and while I was driving two of the plugs worked their way out and popped up out of the holes causing my engine to cease functioning. He called the guy and had the part ordered so that he would have it this morning. I, however, needed to get to work and so borrowed my parents' Vibe and drove back directly. My father is coming tomorrow and I'm meeting him halfway so that we can switch back.
***

One of the benefits to having the Vibe is that my bicycle fits in the back, so I was able to take it to the city to the place where Steve gets his parts and I'm getting it tuned up. I'm pretty excited and get to go pick it up tomorrow. They are replacing a bunch of the parts and it's going to be awesome (and probably safer). The name of the place is Full Moon Vista and it's at 180 St. Paul Street in Rochester. I was super impressed with the guy that helped me- he was really knowledgeable and has been in the bicycle business for a long time. Also, the price is really reasonable for the high quality stuff and service they provide.

***

One last amusing thing before I retire to bed- When I left my room briefly earlier, the house cat here, Clover, snuck into my room seeing the open door. I didn't notice her when I came back in, and went about my business for a little while before being startled by the eyes staring up at me from my bed when I turned. After she knew that I had noticed her, the ritual "love me I'm awesome" dance commenced, pictures of which can be seen on my flickr.

IMG_0019

Tuesday, August 5, 2008

Late mini post

So I definitely need to go to bed soon, but I have two exciting things:

1. I bought the paint for my room today, and got most of the room primed- we ran out with just the top of one and a half of the walls bare- talk about mildly disappointing. So I have to stop at the store tomorrow and grab a quart of primer. Grr. But it's exciting because hopefully I'll get at least the 1st coat of the color up tomorrow. I'm so exited to have a real room really to myself.

2. Steve and I went to the Organic Co-Op today. I got several exciting things, but by far the most exciting is the iced cream made out of coconut milk! Soy-free, milk-free, and non-rice-y. It's made by the company "So-Delicious" who I've seen and eaten soy-based ice cream by, and it really lives up to it's company name.

Monday, August 4, 2008

Verdict on the cake

AWESOME.

So I, and all that partook, were very pleased with the cake.


This is what was left of it after both sets of parents, SJ and I had at it this afternoon. Most of this was finished off by Megan, Jillian and I this evening. We had a really nice girly chat time evening.

Saturday, August 2, 2008

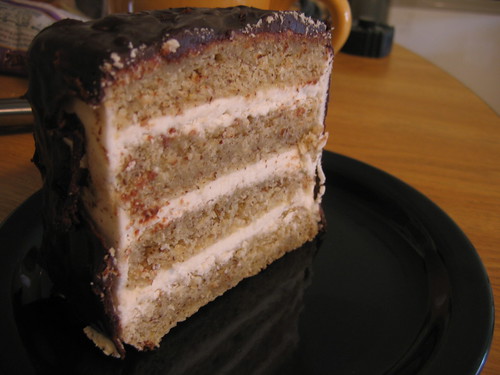
Vegan coconut cake, and the saga of it's making, and I got a flickr

This post is about a seemingly successful vegan coconut cake, and the point that I got a flickr. At the moment, the only pictures on my flickr are of the aforementioned cake.

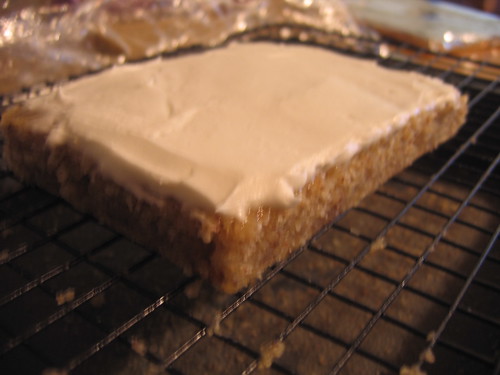
Yesterday I really wanted to make a cake, and my roommate justified making it when I said "there's no reason to make a cake, with the phrase "there is no need to have a reason when cake is involved." I said "okay" and away I went. This cake took a while, but it shouldn't have, I was just silly about a few things.

I haven't technically tasted the cake yet, but the few nibbles of scraps that I tasted were quite good. We'll see how it is tomorrow. It didn't raise very much, so I think if I do it again, I will either 1 1/2 the recipe, or use a smaller pan. It worked really well for thin layer to torte- no need to split them crossways.


I made cupcakes the other day that turned out okay, but nothing to blog about. I had frosting left over, which was one of the reasons for my wanting to make a cake. This frosting would lead to some now amusing mishaps though. It was comprised of granulated sugar disolved into heated coconut milk, beat with an equal amount of coconut oil, then beat into a good measure of confectioner's sugar. It wasn't quite as fluffy as buttercream, but it was quite tasty.

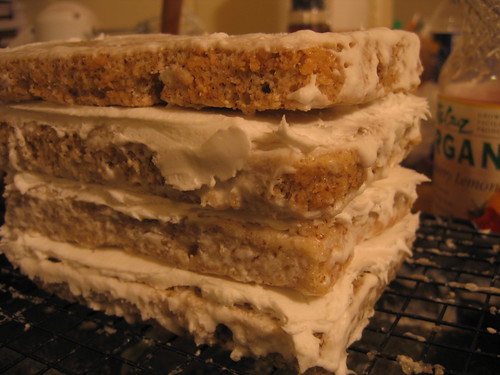
After I made the cake, I let it cool on the counter, then wrapped it in plastic wrap and left it there while I went to work, planning to put it together when I was on my break between jobs. When I got back from work, I beat the frosting a little to soften it to a workable consistency (coconut oil gets rather stiff in the fridge). I then divided the cake into quarters, took one quarter, placed it onto a little rectangle of cardboard covered in foil, and spread a quarter of the frosting on the top. I didn't consider the point that the room-temperature cake might melt the delicate frosting.


By the time I had the third layer on, the second layer was sliding out, and we won't talk about what happened when I tried to persevere and put the fourth layer on (as though that would help somehow). I tried so hard to salvage it, to no avail. After ten minutes I ended up disassembling the stack and scraping off as much of the melt-y frosting as I could salvage (It's a good thing that the cake has hearty structure). This actually ended up working well, because I then put the layers re-covered in the fridge to chill through, and the coating of melted frosting sealed them, so hopefully their few hours in the fridge while I was back at work didn't dry them out too terribly.

Before I went back to work, however, I tried to salvage the frosting. Needing to make a little more, I added a cup or so of confectioner's sugar and a bit of coconut oil. The discrepancy in temperatures, however, caused the frosting to break and become a oily, lumpy mess. I tried heating it through, and that made it worse. Feeling defeated but refusing to scrap it, I stuck it in the fridge and went back to work.

Work went really long and I finally got home just after midnight. As expected, the frosting was hard as a rock, as coconut oil freezes at a very high temperature. I thought about melting it, but didn't think it would help anything, since it just made it separate more before. So I took my hand mixer with the beaters on it and just buzzed the top of the mass. Surprisingly, as it shaved off ribbons, it mixed it all together, and I had perfect, smooth, fluffy buttercream-type frosting after about ten or fifteen minutes! I then took out the four sad looking, glazed cake pieces out of the fridge and much more successfully torted them.


Then I took the left over cream and smoothed the sides with it.


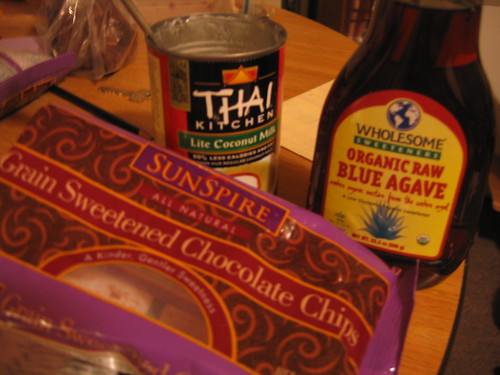
Then came the vegan ganache experiment. I decided to carry through the coconut theme and use coconut milk. When you open a can of coconut milk, if you don't shake it, the milk will be separated into a thick cream-consistency liquid and, pretty much, water. I refrained from shaking the can and used the separated thick coconut cream. I think that this is easier in the non-light versions, but all I had was light. I combined this (about 2/3 cup) with a drizzle (about 1 Tbsp) of agave nectar in a saucepan and brought it to a rapid simmer. I then poured it over 1 1/3 cup organic chocolate chips (Sunspire brand- they are so delicious! I could just eat a bag- no need to make anything with them). I let it stand for a few minutes, then stirred it until it was smooth. It seemed a little thicker than ganache that I'd previously made, but was a nice consistency. At this point you are supposed to add a little liqueur or flavor extract, but I forgot.


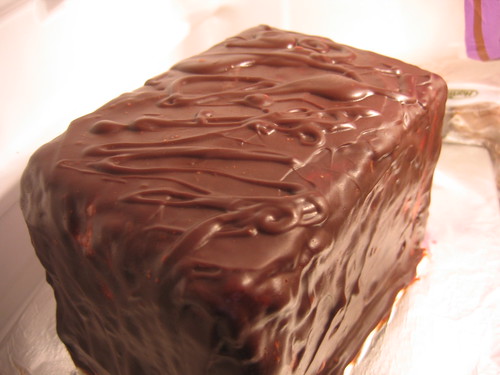
I let the ganache sit for a few more minutes to cool to 90-ish degrees, as I've heard suggested, so that it wouldn't melt the cream frosting and be thick enough to give a good coating. I should have waited a little longer though, because the stayed nicely on the top, but most of it slid off the sides and it ended up looking like Mecca, oddly enough.


I persevered again though, and moved the wire rack and spent several minutes scooping up ganache and spreading and re-spreading it on the sides. Eventually I got a nice covering. Not perfect- but nice and mostly even. I drizzled some over the top too, to hide the imperfections. There is a little bit of speckling from the frosting being pulled through. I think that I was pretty successful though- especially in my frazzled state at one in the morning.


After it chilled in the fridge, the ganache stiffened up quite nicely, and it looks like real ganache. :) I'm pretty happy with it. For all of it's grief though, it better taste darn good!


Now that you have the back story- here's the

Recipe!

Vegan Coconut Torte (or just cake, if you just make the cake):

Preheat oven to 325, grease and flour a 9x13 for a thin cake, or another size pan of your choice.

In a food processor combine:

1/4 cup ground flax meal
1/2 cup tapioca starch
3/4 cup unsweetened, shredded coconut
2/3 cup light spelt flour (**for GF readers, spelt is not gluten-free! I digest it better than wheat, so if you are just wheat sensitive I highly suggest it, but it *is* glutinous!**)
1/4 cup almond flour
4 tsp baking powder
(if using GF flours instead of the spelt, don't forget the xanthan gum)

Process for a few minutes until coconut is reduced to flour. If you have coconut flour, sift flours together and skip the processor.

In a separate bowl mix together:

1 1/2 cup organic unrefined sugar
1 tsp salt

Blend and add to the sugar:
1 1/4 cups coconut milk, warmed
1/3 cup melted and cooled coconut oil
prepared egg replacer for three eggs

Slowly add flour blend by sifting it over the wet ingredients while whisking. After all of the flour is added, if the batter is still thin, you may need to add a little more flour. I ended up adding three extra Tablespoons of spelt.

Dump into prepared cake pan and bake for 30-40 minutes or until firm to the touch and a toothpick or knife inserted into the center tests clean.

Remove from oven and let rest for five minutes.

Loosen edges of cake if necessary and invert onto lightly oiled rack. Once cooled, wrap tightly and CHILL thoroughly. Prepare whatever filling you would like to separate the layers with while the cake is chilling, and chill the filling if necessary. Cut the layers if necessary and assemble as desired. Chill the cake while you prepare the ganache, place cake on wire rack over a pan and pour the ganache in the center of the cake, allowing it to drip over the sides and coat them. With a round cake this is usually not to hard, a square cake takes a little more convincing on the ganache’s part. Chill for several hours until ganache is set and there is no temperature discrepancy among the components.


I will post pictures of the sliced end result tomorrow, and give a review on the taste and flavor combinations.